Organizing your recipes using an Android tablet or iPad

For the past few years I have been getting most of my recipes online. I just print out the recipe and keep it in a folder in my filing cabinet. A few months ago I got fed up with having all the paper around, so I found all the recipes again and saved PDFs. This was great, except then I would print the recipe every time I needed it.  To save paper, I started to pull the recipe up on my computer screen and I would go back and forth from kitchen to office, trying to remember my recipe. When tablets finally became cheaper, I figured this would be a great way to organize and use my recipes in the kitchen.

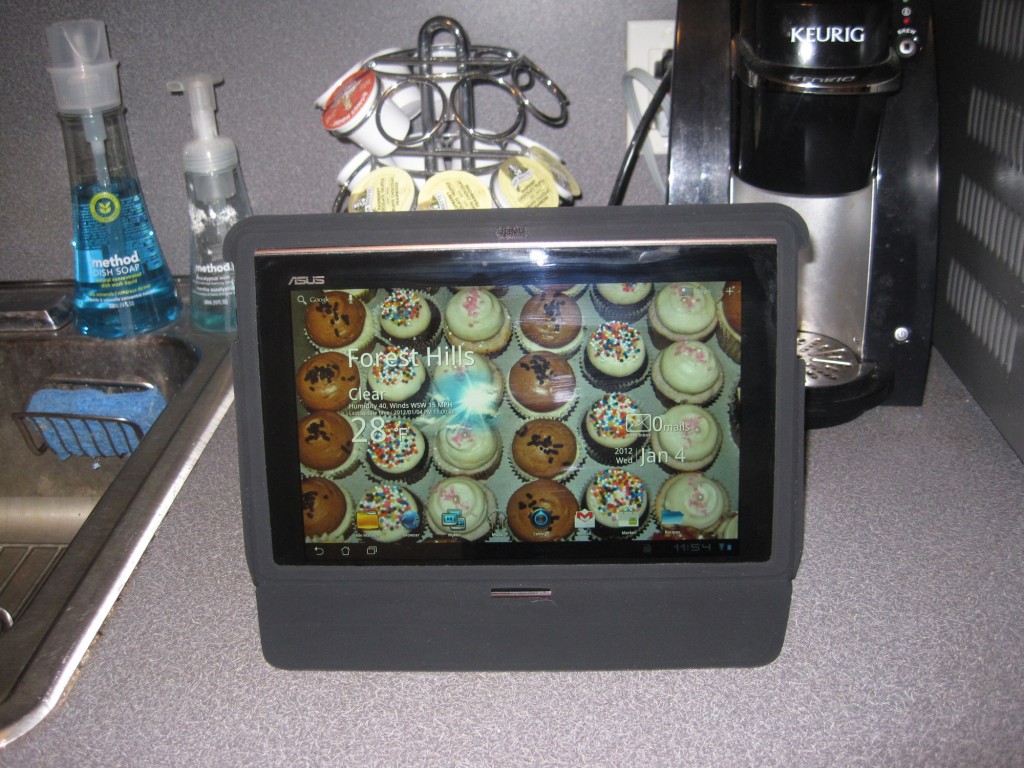
So I ventured out on Black Friday this past year and scored an Asus Transformer Tablet (model TF-101).

Tablet3

Scored is probably a strong word…the whole experience was horrific and I had to work very hard for that tablet.  I’m no stranger to Black Friday. My dad and I have been going for years, especially when I was younger. Now that I’m married, we go on together on the years that I spend Thanksgiving in MA. This year I spent Thanksgiving in NY, and that was probably lucky for my dad, since he didn’t have to suffer with me.

Normally Black Friday starts at 5am, so you get up at 3:30 after a few hours of sleep and brave the cold. The lines are bad, but really there aren’t THAT many crazy people who are willing to be up that early. This year was the first year that Best Buy opened at midnight. So there were A LOT more people, and you had to get in line at 9pm or earlier. After waiting 3 hours in line, I had to wait ANOTHER 2.5 hours inside the store before I could even get my tablet. Usually when the store opens at 5am there are less people and you are in and out in under an hour. But, I got my tablet, and now I’m about to show you how you can organize your recipes and even mark up the PDFs as you go through each step of your recipe.

Protecting your tablet:

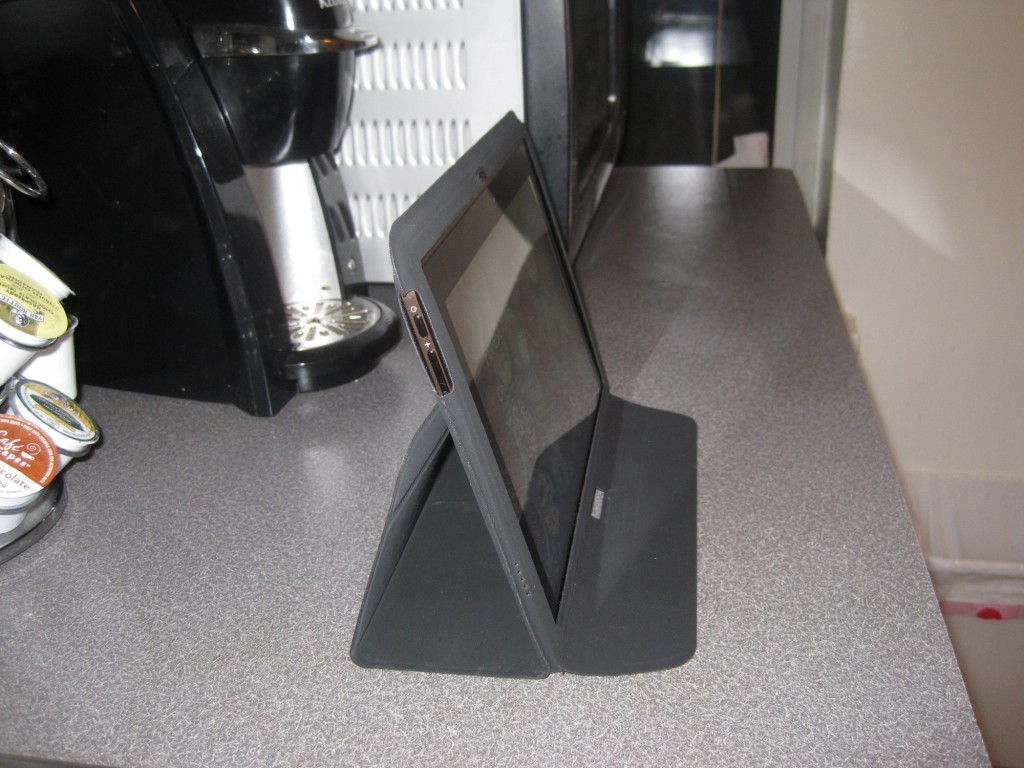
First off, I highly recommend getting a case for your tablet, preferably one that is also a stand. That way you can keep it protected both when in use, and when you store it away. My husband gave me this case for Christmas, and so far it has been great!

Tablet1

Tablet2

Organizing recipes:

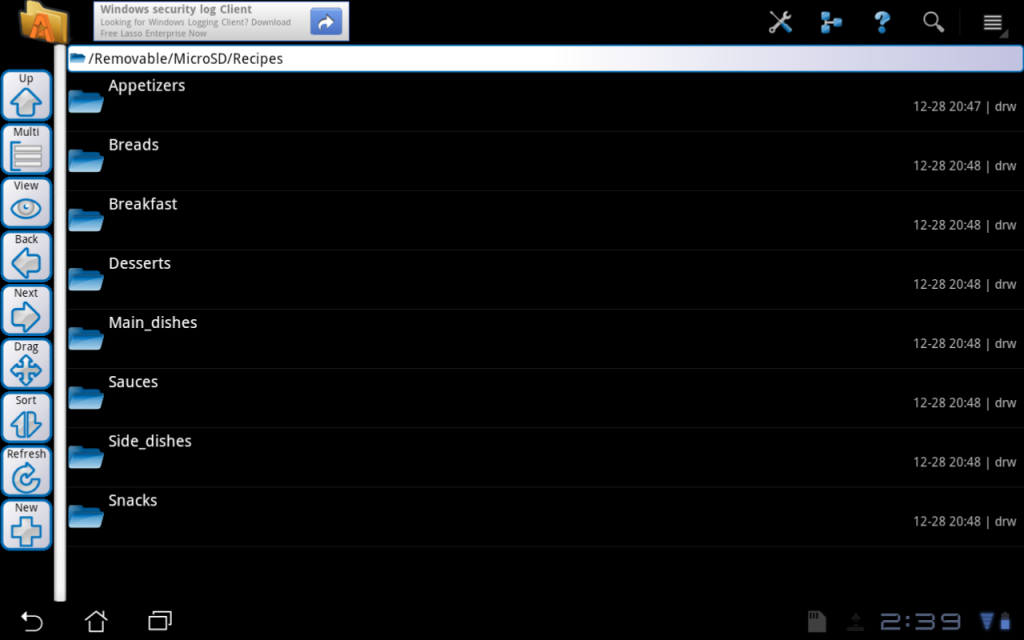
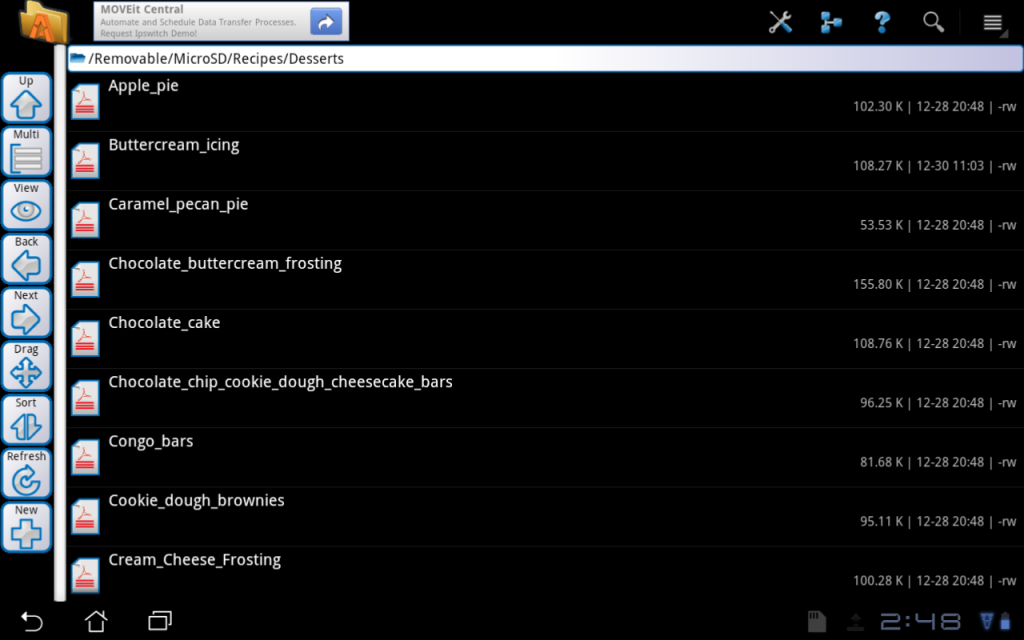
I would recommend getting all of your files together and organized on your computer before transferring them to the tablet. I name my PDFs in a very descriptive manner, so I know exactly what the recipe is. Then I organize my PDFs into folders, based on the type of food it is. I have eight main categories: appetizers, breads, breakfast, desserts, main dishes, sauces, side dishes, and snacks. I like to host brunch, so I have a breakfast category. Other people may make a lot of pasta dishes, so they could have a pasta dish category. It just all depends on what foods you make most often, and what organization scheme is easiest for you. Most of my main dishes are chicken, but if you make a lot of beef and fish, you could separate out your main dishes by protein type.

Tablet_screenshot2

Tablet_screenshot1

Getting your recipes onto the tablet:

There are a few ways you can get files onto your tablet. If your tablet has an SD card, you can use a card reader on your computer to copy the files to the SD card. You can also connect your tablet to your computer via USB and use a file transfer program. Since I use a Mac, I used the Android File Transfer program. There is also Dropbox, which is a cloud service used to sync files between multiple computers, phones, and tablets. Dropbox is nice because once you change the file, it is updated in all locations where you have installed the Dropbox program. It’s completely free, and you just need to sign up for it.

Marking up your PDFs:

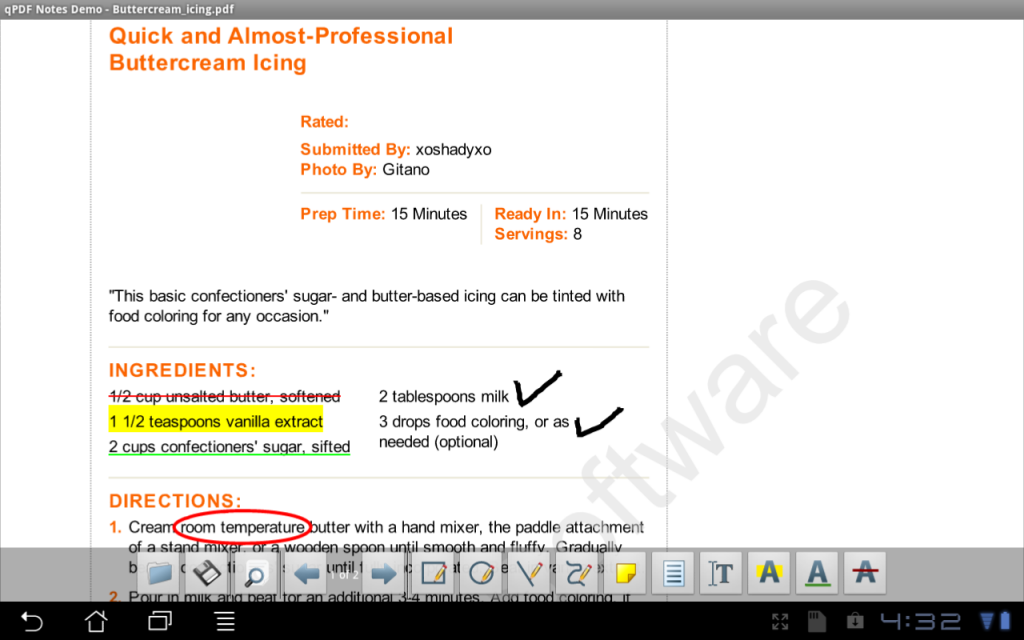
If you are anything like me, you may be paranoid about forgetting steps in your recipes. I always like to check things off as I go, to make sure I don’t leave out any ingredients. Sometimes I like to underline steps if they are easily forgotten. This is why it was really important that I find a good PDF annotation program. I wanted something where I could open a PDF, make marks and notes, and then close without saving so that I start with a clean version the next time. I tried out two different Android programs: qPDF Notes demo version and ezPDF reader. If you click on the link, it will bring you to the reviews on AppBrain. There is also Foxit Mobile PDF, which I didn’t try.

There are many PDF annotation programs available for the iPad as well. Here is a website I found reviewing several annotation programs for the iPad.

qPDF Notes Demo Version: 

qPDF Notes is a $10 program, so I opted for the demo version, which is free. The only downsides are that you get a reminder to buy the real program each time you open it, and there is a watermark on the page. Honestly, the watermark is pretty light and doesn’t bother me at all. I like the functions that qPDF Notes has, such as strike through, underline, highlight, and freehand drawing. You can also draw boxes and circles around text. I especially like that for the strike through and underlining, you don’t have to be very precise in the straightness of your line. You just have to make sure your finger actually passes through the text. It can be a little tricky at first, but after a little practice you get the hang of it.

Tablet_screenshot7

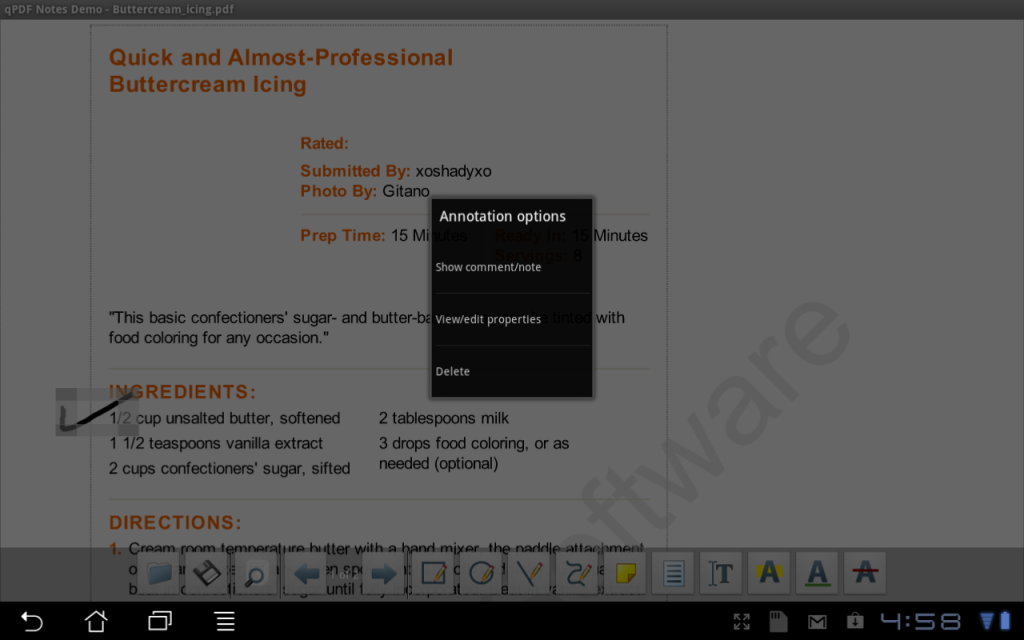
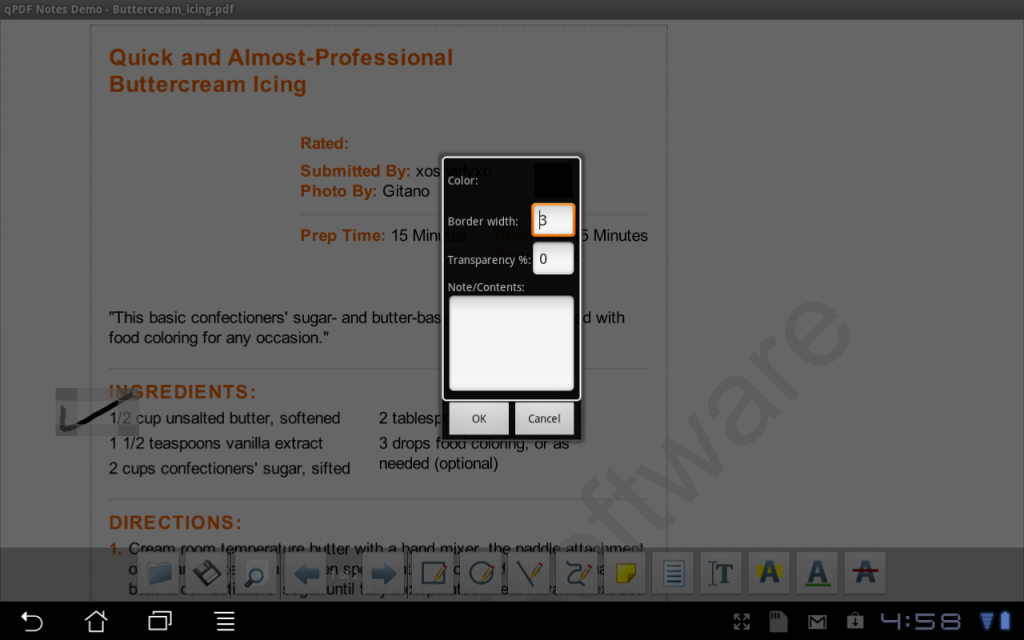
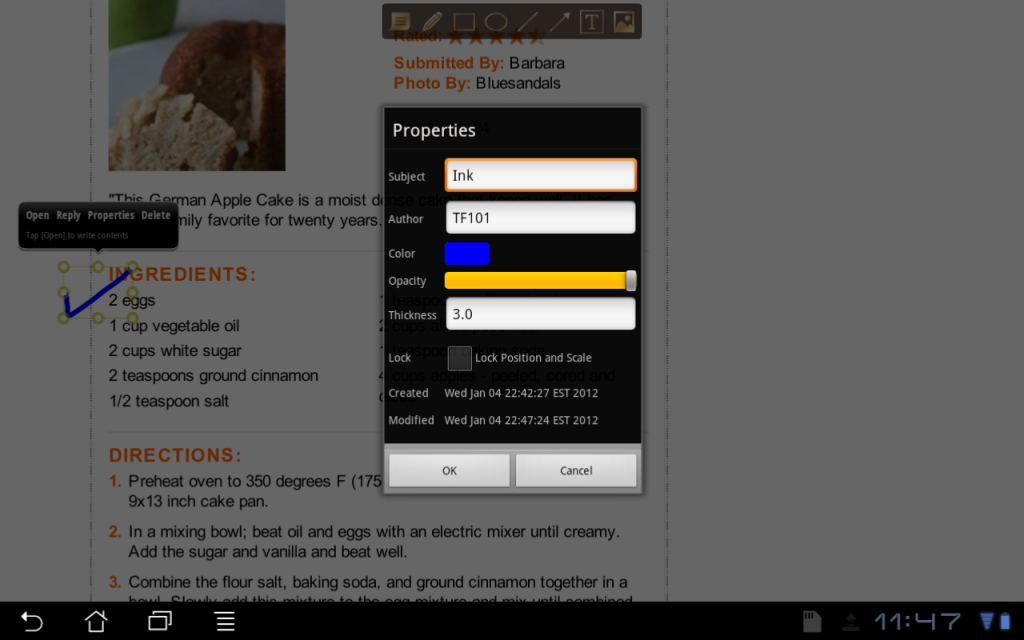
For each individual item that you draw, you can click on it to delete or modify the attributes. For the strike through, underline, and highlight, you can change the color but not the thickness of the line. For the freehand drawing, you can change the thickness, but not the color.

Tablet_screenshot6

Tablet_screenshot5

Perhaps the paid version gives more options. Honestly, I think it’s a great free program and I don’t mind only having a few options, especially since I’m only using it to make check marks and cross out words. It’s easy to use and you can just delete each item before closing to ensure that you start with a clean version the next time you open your recipe.

ezPDF Reader:

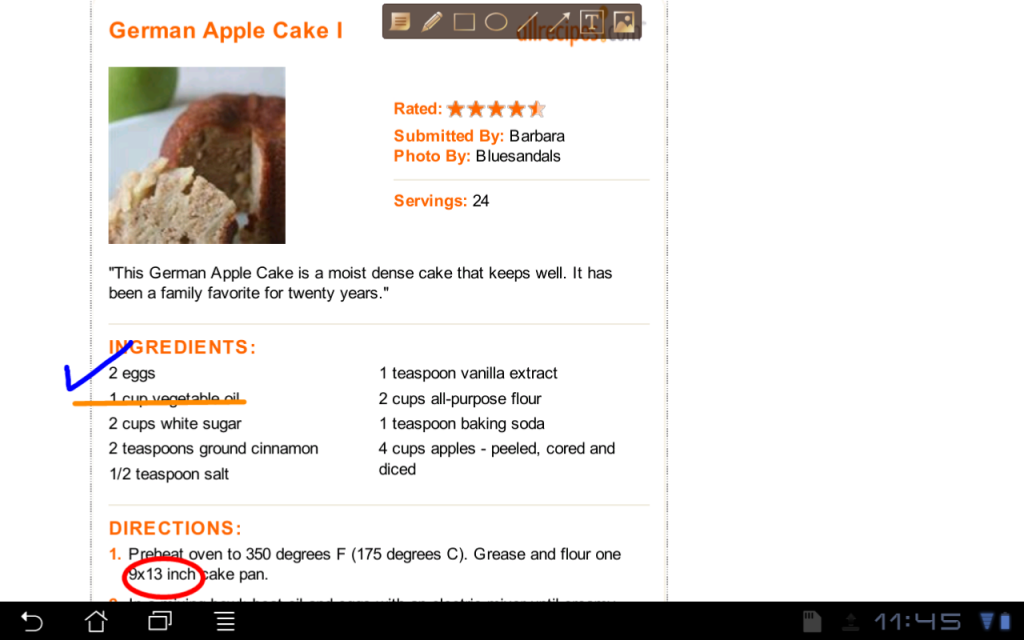
ezPDF Reader is pretty inexpensive at around $3, so I figured I would try this one as well. Since I paid for this version, it has no watermark or reminder to buy it every time I open. If you are easily bothered by these things, then you may want to go with this version. I did find however, that there were less annotation options. There were freehand, line drawing, and circling features, but no strike through, underlining, or highlighting features. You could also draw arrows, though I’m not sure how useful that is for recipes.

Tablet_screenshot4

This program does have more options for changing colors and thickness of your lines, though.

Tablet_screenshot3

I think both programs are great for the purpose of quick markups of recipes as you are cooking. This has totally eliminated my need for printing out recipes and wasting paper. Hopefully if you have a tablet you can do this too. You can even scan your favorite recipes from your old cookbooks.

Posted in Kitchen Equipment, Tutorials | Comments Off on Organizing your recipes using an Android tablet or iPad

How to level, layer, and frost a cake

I don’t usually show tutorials, but my last layer cake came out pretty well and I took pictures during the process. Layering a cake can be tricky, so I thought I would make a post dedicated to tips and tricks to make it easier.

Grease the pan really well

The main thing is that you want your cake to remain intact at all steps. By this I mean you don’t want little pieces breaking off because this will affect the structural integrity of the cake. The very first thing you need to do is ensure that the whole cake comes out of the cake pan unharmed. Make sure the pan is greased very well. I use a silicon brush to place Wilton Cake Release on the whole inside of the pan. Make sure to get the inside corner where the bottom and side of the pan meet. If this area is not greased, the cake will stick in the pan and the bottom edge of your cake will be jagged. 

Remove the cake after it cools

The key is to remove the cake very gently, and after it has cooled for 10-20 minutes. The sides of the cake should be somewhat separated from the pan. Take a cake decorating spatula and gently place it between the pan and the side of the cake. Carefully go around the cake moving the flat end of the spatula inward towards the cake to separate it from the side. When you are finished with this, place a large, flat plate face down on the pan. Flip it over so the plate is on the counter and the pan is upside down on the plate. Gently tap the bottom of the pan with your hand and  the cake should come out. If you have separated the sides enough, you may not even have to tap the pan. It should just come out. Lift the pan off the cake.

Chill the cake for 12-24 hours

Cold cake is more resilient and easier to work with, so I like to make my cakes the day before decorating. After the cake is flipped onto the plate, I place it in the fridge and start working with it the next day. Usually I will also make my frosting the day I make the cake, and also chill it. This ensures that the frosting starts out firm. If it gets too warm, it can be soupy and won’t hold any shape for piping.

Leveling the cake

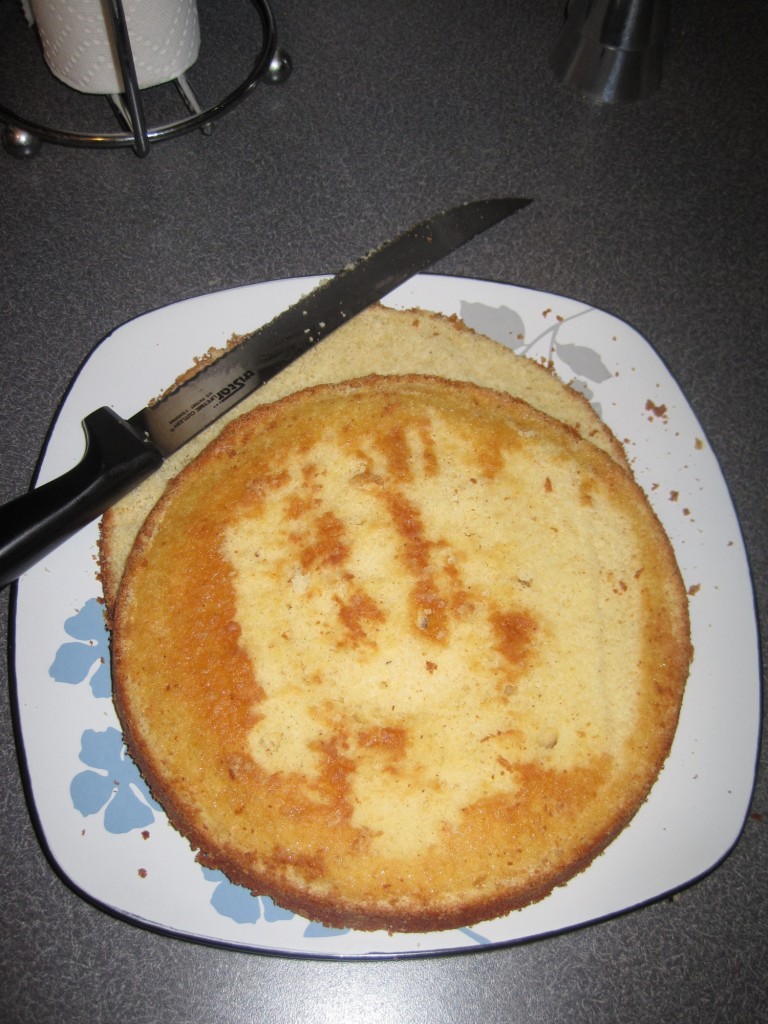
Usually, when cakes bake the top becomes rounded as it rises. You want the cakes to be flat on top so they are more stable when you layer them. Really you just want to shave off the top edges that are burnt, and the top rounded bit of the cake. Probably it is 1/16 of an inch, if that. It’s a tiny thin piece, just enough to get the top of the cake flat. I like to use a serrated knife. I find this easier than any commercially available cake tools.

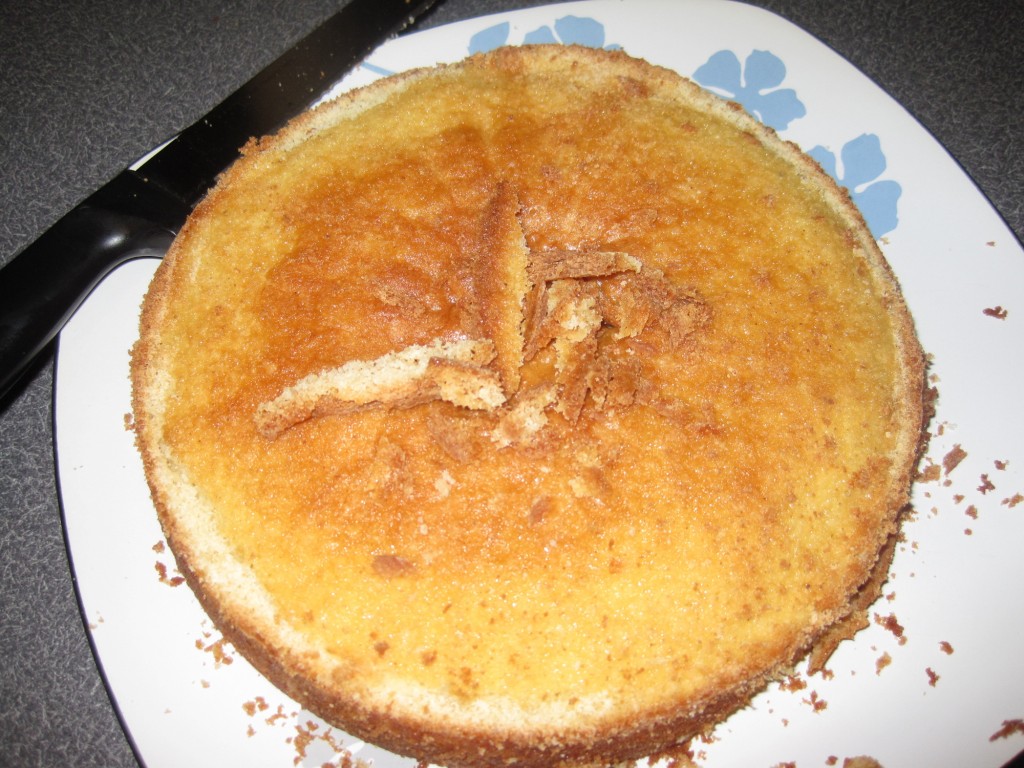
Here is the cake after I have removed the burnt top edge.

Here is the cake after I have removed the burnt top edge.

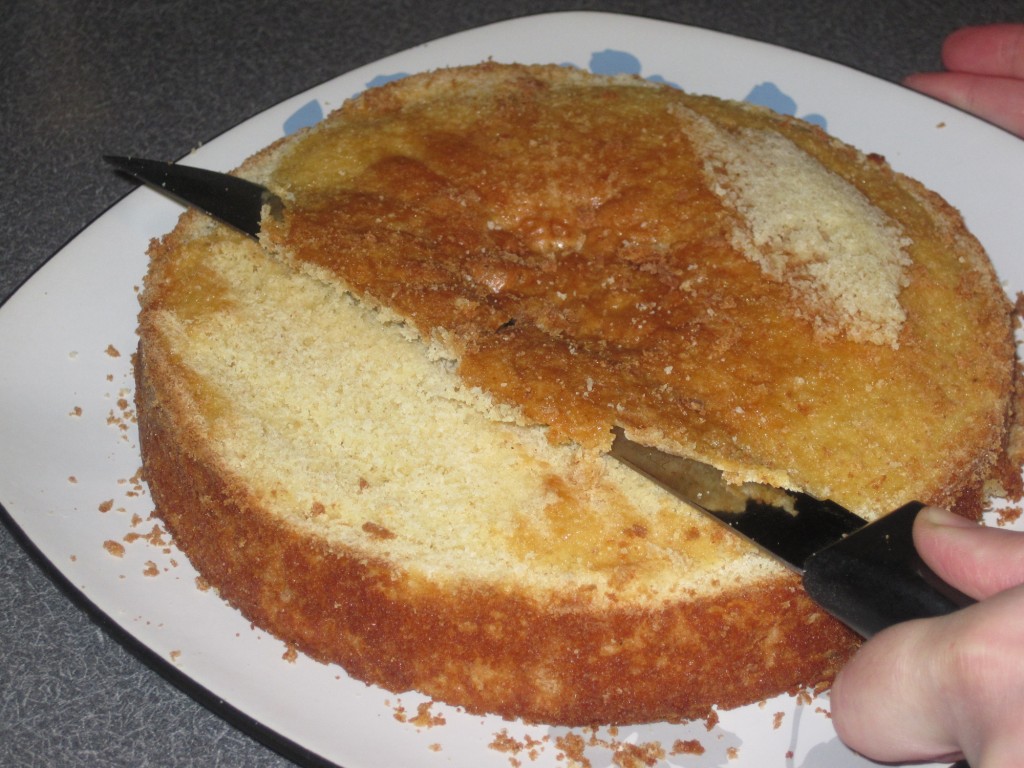
Now I am removing the rounded part to make the cake flat on top.

Now I am removing the rounded part to make the cake flat on top.


Layering the cake

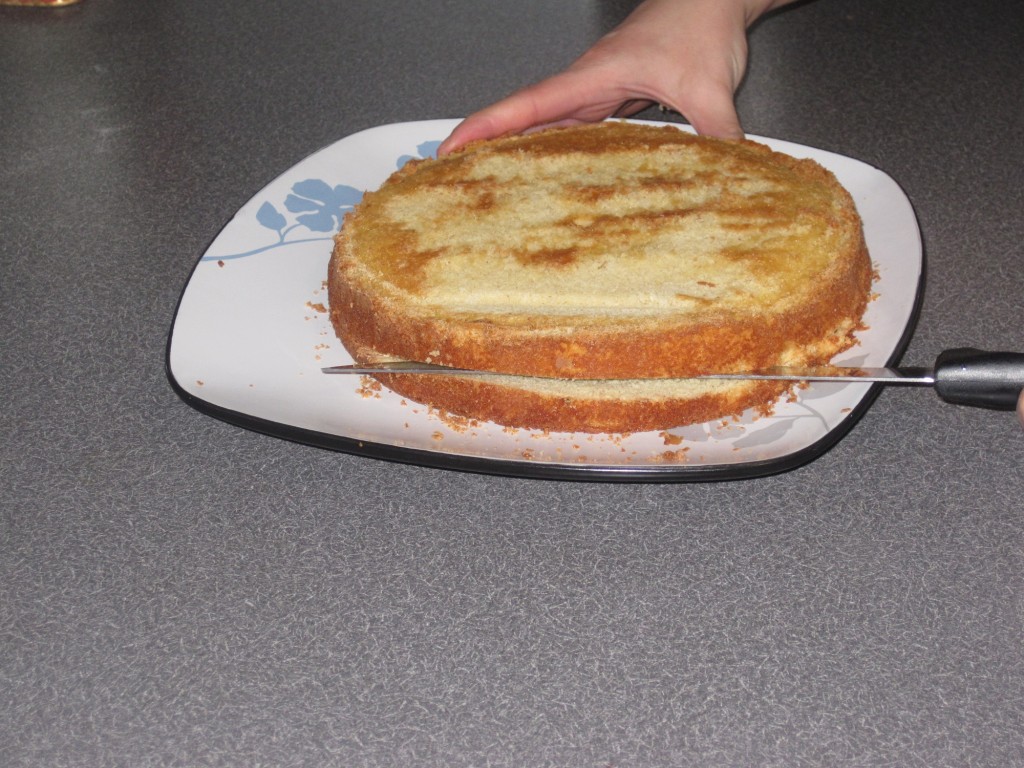
Also called torting, this is where you cut the cake across the transverse plane to make it into two layers. For a 2-layer cake, you need one cake. For a 4-layer cake, you need two cakes. This is just a general rule of thumb, especially if your cake pan is 2 inches high. Again, I like using a regular serrated knife for this part. Just start at the edge, in the middle of the cake. Hold the top of the cake for support and start cutting inward. You can rotate the cake as you go, but make sure the knife is level so that the two pieces of cake end up even. Separate the two layers of cake.

Cake_tutorial3

Cake_tutorial4

Frosting the cake

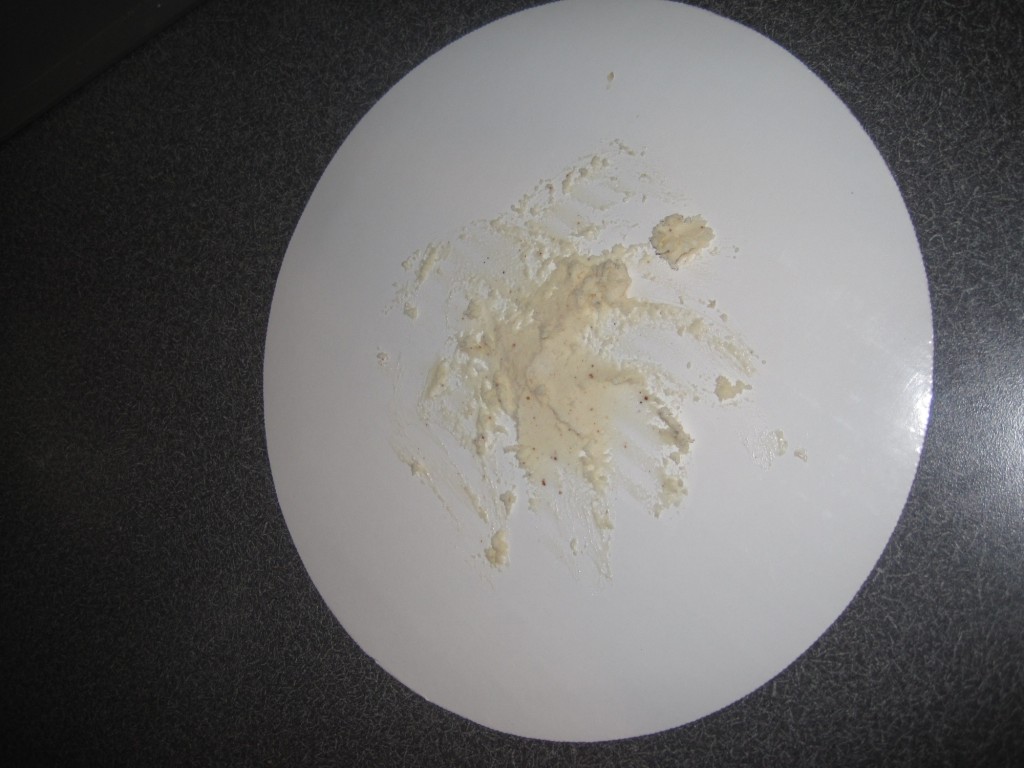
Now comes the fun part. Let your frosting warm up a bit out of the fridge. If it is too cold, it may tear the cake. Place a dollop of frosting on the cake board and spread it around. You will place the cake on this dollop, and it will glue the cake to the board so it doesn’t shift.

Cake_tutorial5

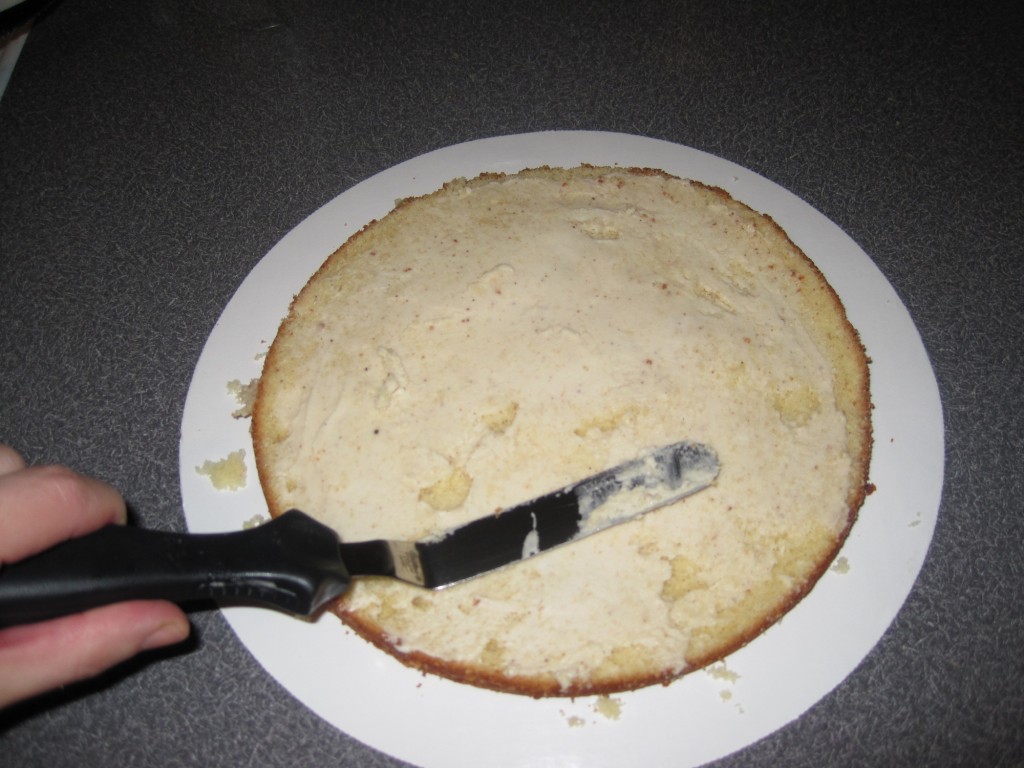
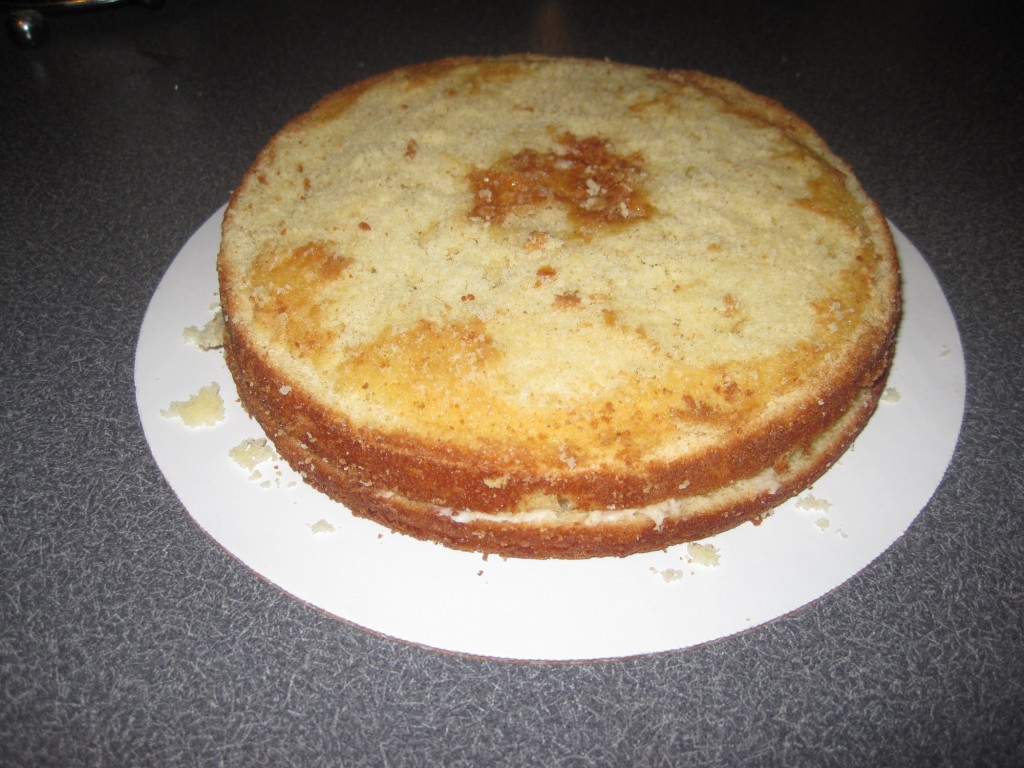
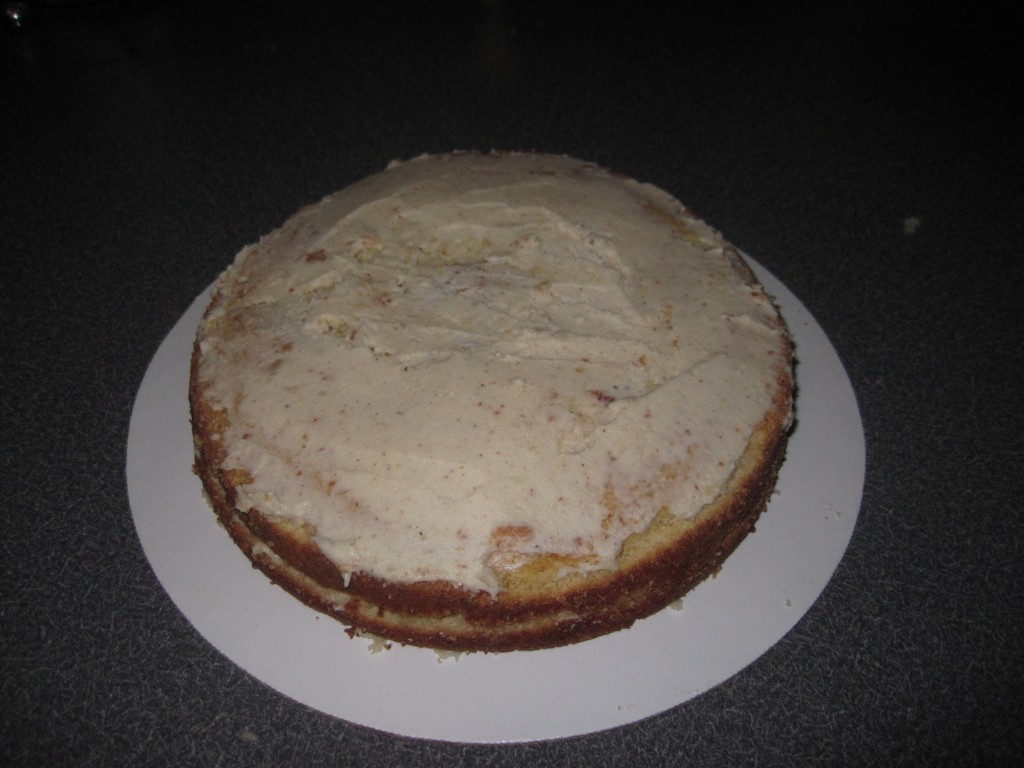
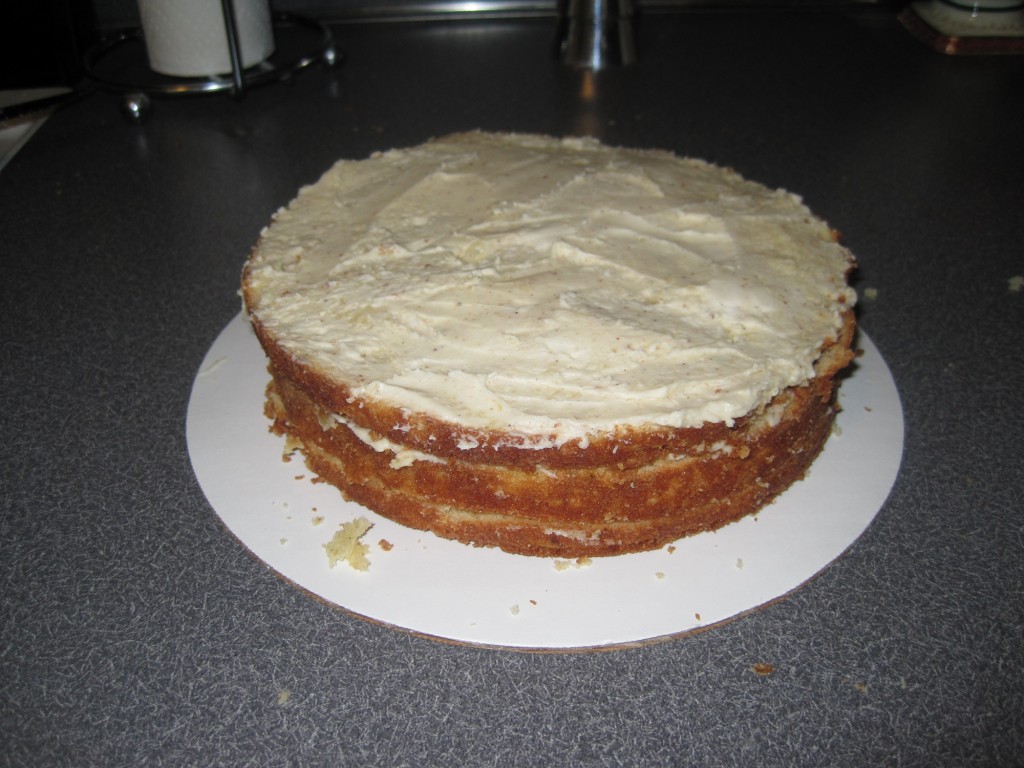
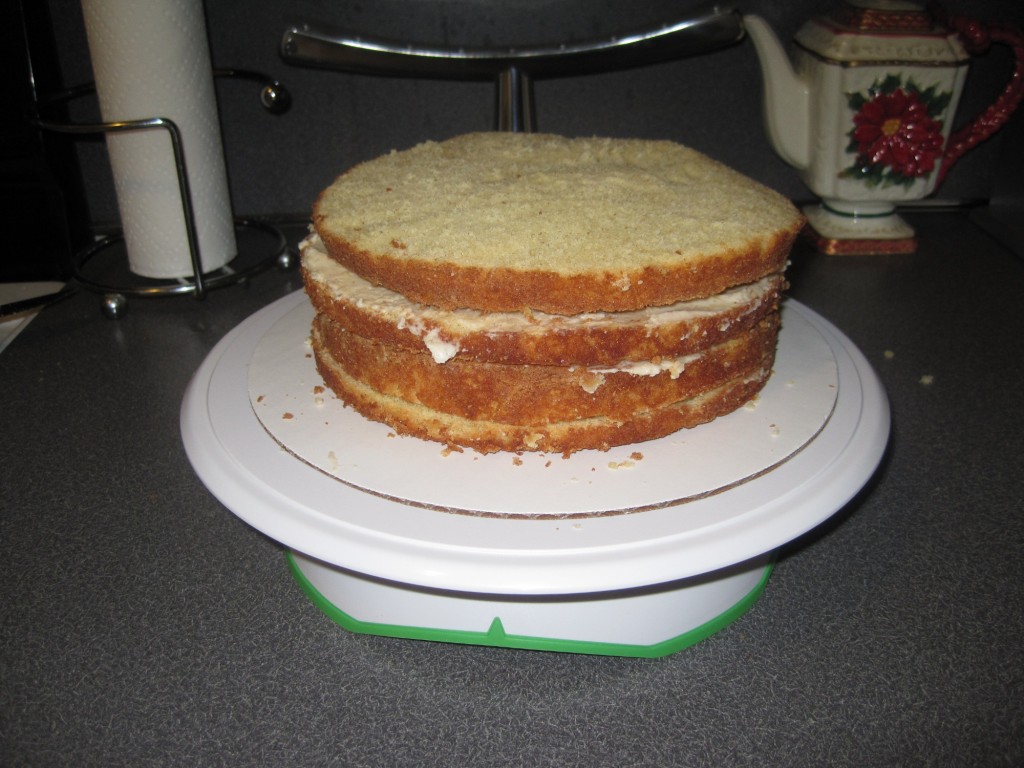
Next, place one layer of cake on top of that and frost the top. Don’t worry about the sides until after the whole cake has been constructed. Keep placing a layer and frosting the top until the cake is the desired number of layers.

Cake_tutorial6

Cake_tutorial7

Cake_tutorial8

Cake_tutorial9

Cake_tutorial10

The crumb coat

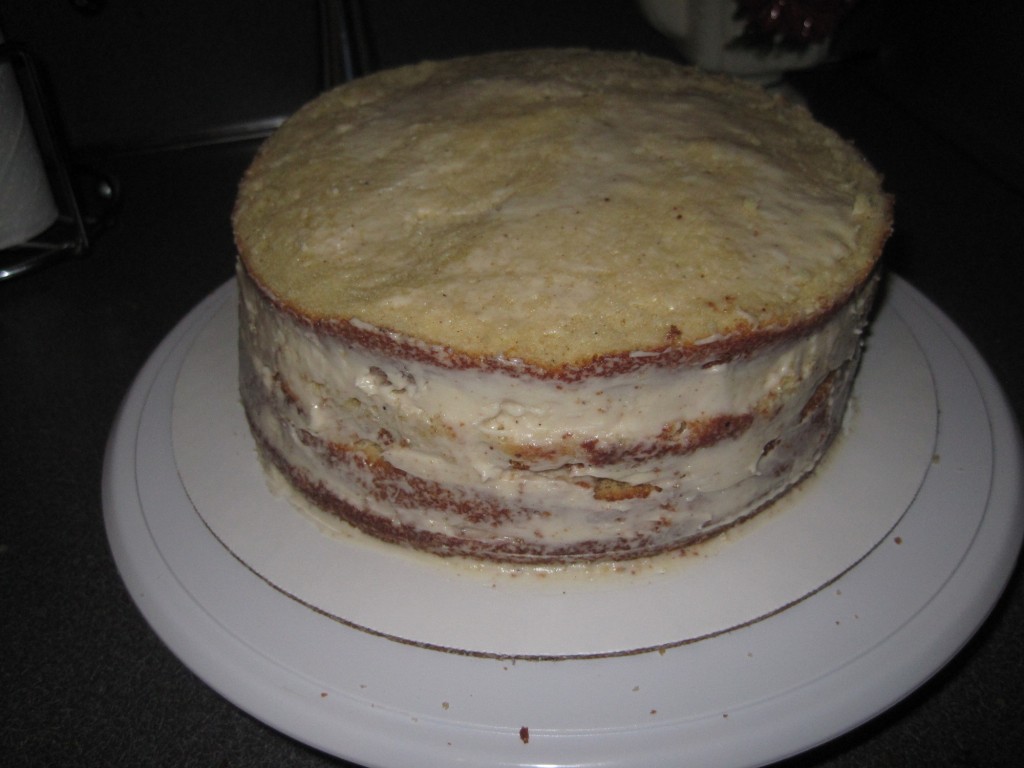
Here is where I break out my turning table. If your cake is round, then a turning table really helps in frosting your cake. I like to start with the top and then move onto the sides. The crumb coat is a very thin layer of frosting where you basically can see the cake through it. It has two purposes: to keep crumbs from coming off the cake when you frost it, and to fill in any gaps between layers if your cakes are uneven. A crumb coat basically creates a smooth canvas for when you frost your cake.  Once you crumb coat your cake, let it sit in the fridge at least 30 minutes to harden before frosting.

A crumb coat. Note the side has a little thicker frosting to fill in the gaps between the layers of cake.

A crumb coat. Note the side has a little thicker frosting to fill in the gaps between the layers of cake.

Frosting your cake

Now you are ready to frost your cake. Again, I like to start with the top and then work my way to the sides. Place a dollop of frosting on the top of the cake and smooth with the spatula. You can turn the cake as you do this to make it easier to smooth the entire top of the cake. Then place some frosting on the side and turn the cake again until the cake is frosted all the way around. To make a smooth appearance, dip your spatula in hot water, wipe it off with a paper towel, and smooth over your cake. The frosting will melt a little and any bumps should be smoothed out.

Cake_tutorial12

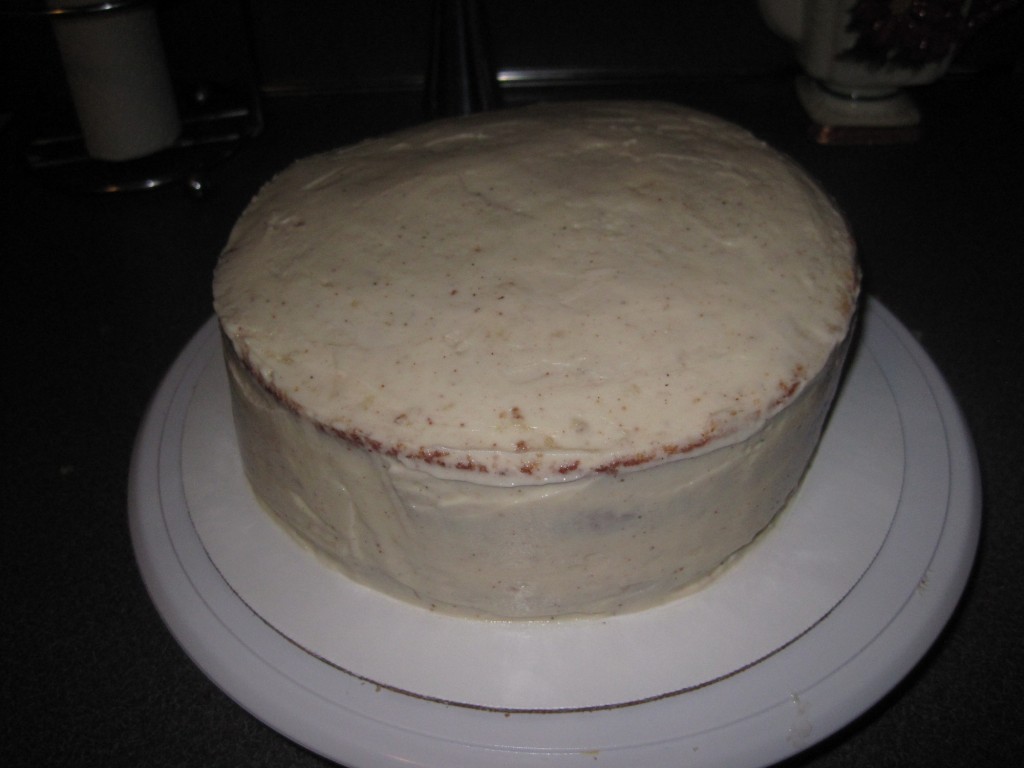
And there you have it. The only thing I don’t know how to do is hide the top edge of the cake when using white frosting. I always find that it shows through and I have to pipe frosting on top or hide it some other way. So any recommendations on how to do this would be greatly appreciated!

Posted in Tutorials | Comments Off on How to level, layer, and frost a cake

Happy New Year!

It’s a day late, but I wanted to wish everyone a Happy New Year! I hope 2012 brings everyone health, happiness, and lots of yummy cake (unless of course your New Year’s resolution is to eat less cake).

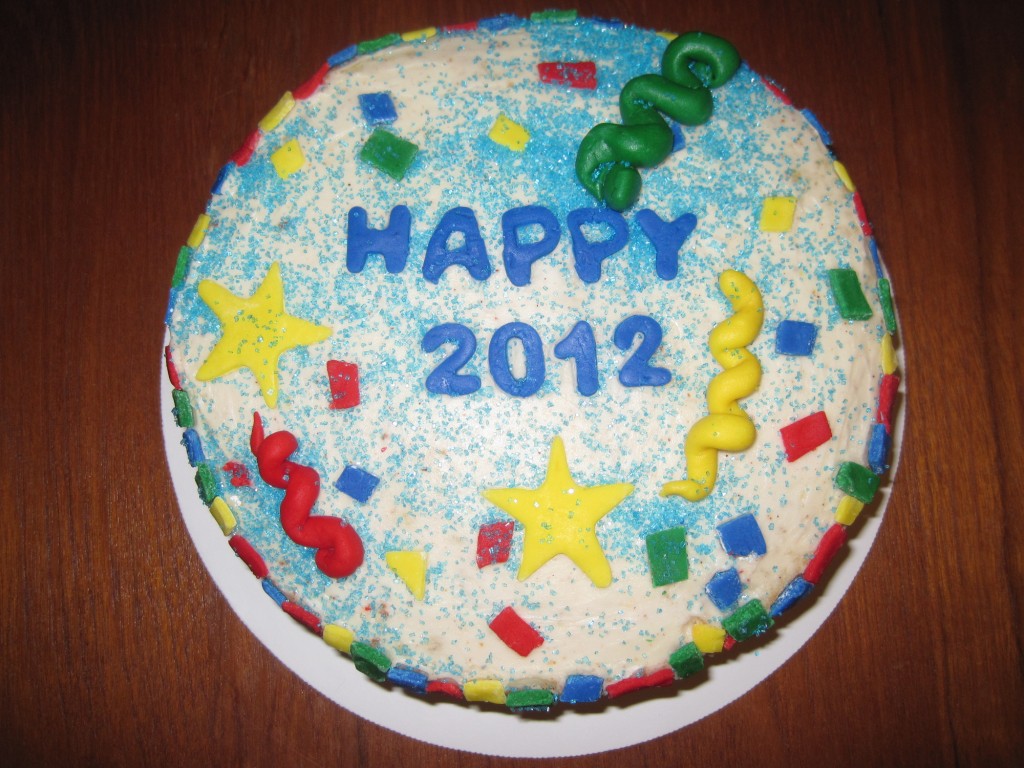
Here is a cake I made for New Year’s day. It’s an eggnog cake with rum butercream frosting. I thought it was the perfect way to ring in the new year. I saw the recipe on The Pink Apron Baker and knew I had to try it.

Happy_2012_cake1

Happy_2012_2

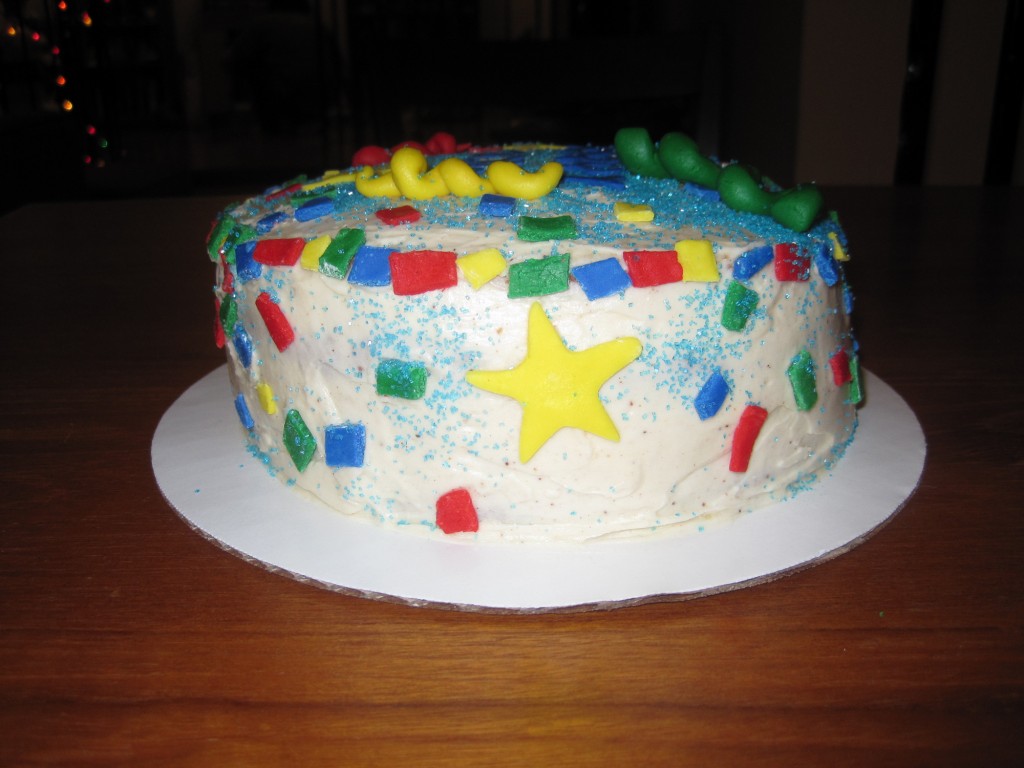
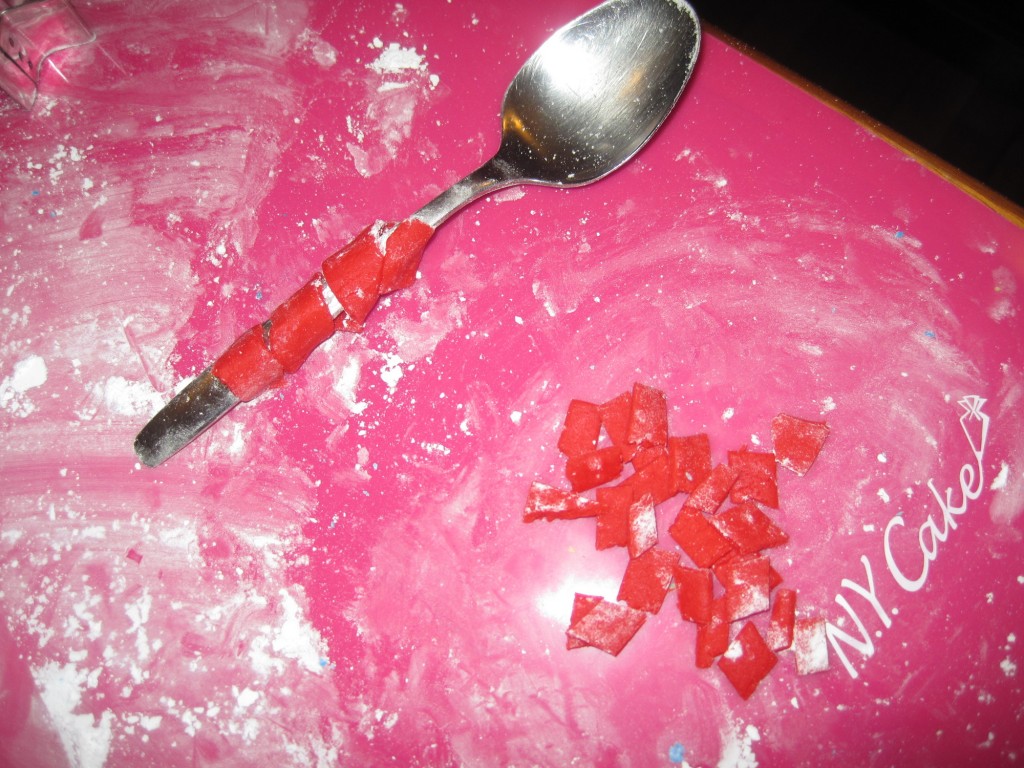
The cake is 4 layers with rum frosting in between. I made confetti and streamers out of marshmallow fondant, and sprinkled the cake with blue sugar for an overall sparkly effect. For the confetti, I rolled out the fondant, cut strips, and cut the small squares of confetti with a pair of kitchen scissors. For the streamers, I rolled the fondant in my hands into a snake shape and wrapped it around the end of a spoon. I let it dry a bit and then slid it off the spoon and placed it on the cake.

Happy_2012_cake3

After everything was assembled, I used a bottle of compressed air to get rid of the excess sugar that had fallen onto the cake board. I found this worked really well.

Eggnog Cake with Rum Buttercream Frosting (from Pink Apron Baker)

Makes 2 8-inch cakes, and about 4 cups of frosting (enough to frost between the layers and the outside of the cake)
Ingredients
  • For the cake
  • 4 eggs, at room temperature
  • 1/2 cup eggnog, at room temperature
  • 2 tsp vanilla extract
  • 1 3/4 cups cake flour
  • 1 1/2 cups sugar
  • 2 tsp baking powder
  • 3/4 tsp salt
  • 1/2 tsp nutmeg
  • 1 cup unsalted butter, at room temperature, cut into 16 pieces
  • For the Frosting
  • 2 cups butter, softened
  • 4 cups confectioners sugar
  • 4 TBSP dark rum
  • 2 TBSP eggnog
  • 1 tsp nutmeg
Instructions
To Make the Cake
  1. Preheat the oven to 350 degrees. Prepare both pans with Wilton Cake Release. In a medium bowl, whisk together the eggs, eggnog, and vanilla; set aside.
  2. In the bowl of a standing mixer, combine the flour, sugar, baking powder, salt, and nutmeg. With the mixer on medium low, add the butter one piece at a time until the mixture looks sandy, and just start to come together. Add half of the eggnog mixture and mix on low until it just comes together. Increase the speed to medium high speed and beat until light and fluffy, about 1 minute. Reduce mixer speed to medium, and add the remaining egg mixture in a slow, steady stream. Continue mixing until thoroughly combined, scraping the bowl, as needed.
  3. Divide the batter into the two pans, and smooth the top with a spatula. Bake for 20-25 minutes, or until a toothpick inserted in the center comes out clean.
To Make the Frosting
  1. Place butter in a bowl of electric mixer and beat on high until smooth about one minute. Add in sugar and nutmeg and mix at a medium speed until incorporated about 2-3 minutes. Add rum and eggnog and beat on high until frosting is fluffy about 4-5 minutes.
Notes

I found that the cake needed more like 30-35 minutes, but you can start with 25 so that you don’t overcook the cake.


Posted in Cakes, Frostings/Icings | 1 Comment

Bridal shower cake pops

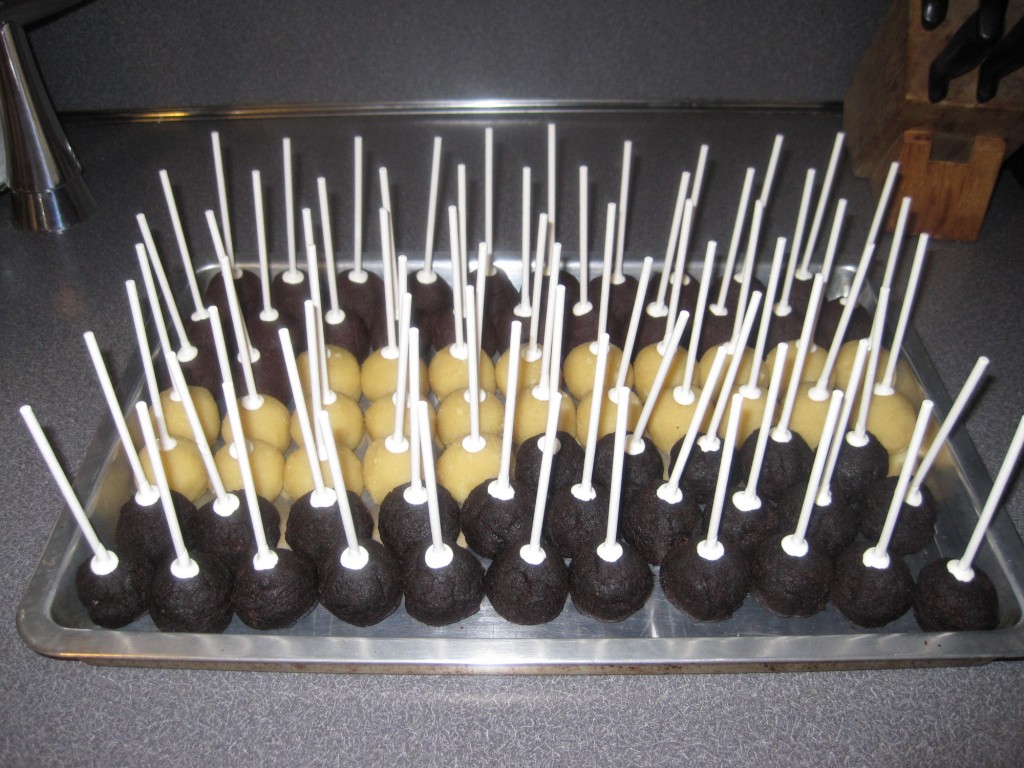
The weekend before Christmas was my sister-in-law’s surprise bridal shower. I definitely wanted to bake something special for it, and originally I was thinking of making Petits Fours. They were my favorite confection growing up and we had them for all special occasions and holidays. Shows how hip I am. Now, the new thing is cake pops. I had heard of them, but had never had one. So, being the scientist that I am, I did some research.

Cake pops are a heavenly, dense mixture of cake and frosting on the inside, and a hard candy coating on the outside. Of course, they are attached to a lollipop stick, and they are about 2 inches in diameter. They can be decorated with sprinkles or sugars, or made into completely unique shapes depending on your creativity. As far as I can tell, they were created by Bakerella, but are also available at Starbucks. If you still don’t know what I’m talking about, here the original cake pop post on Bakerella’s blog.
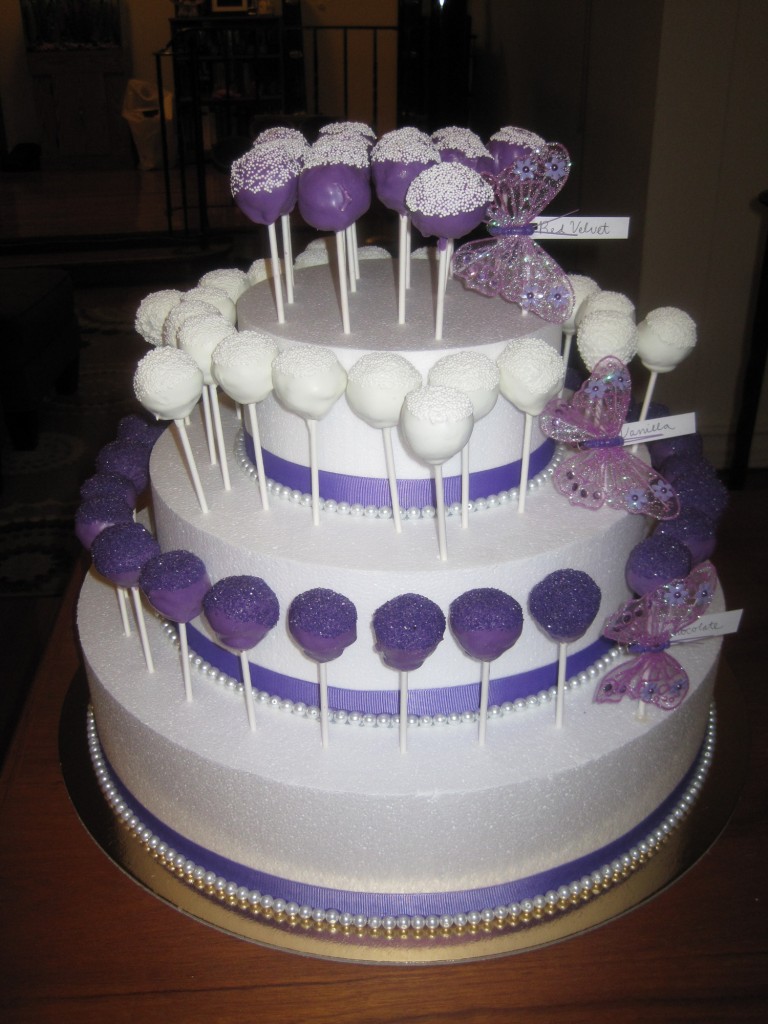
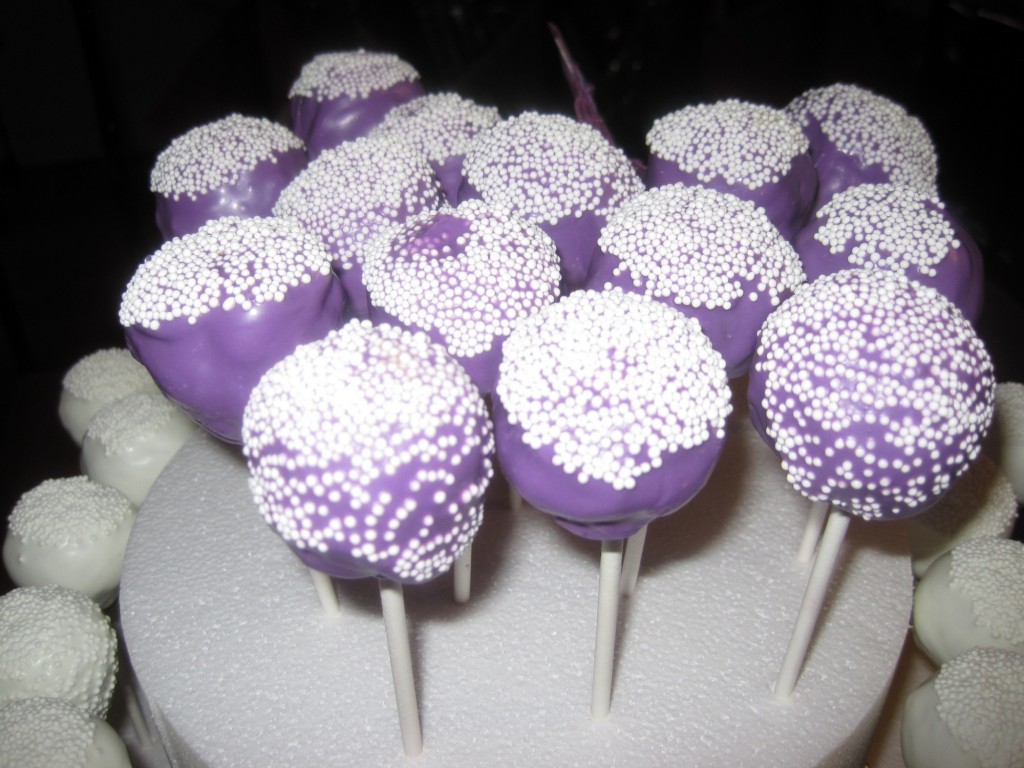
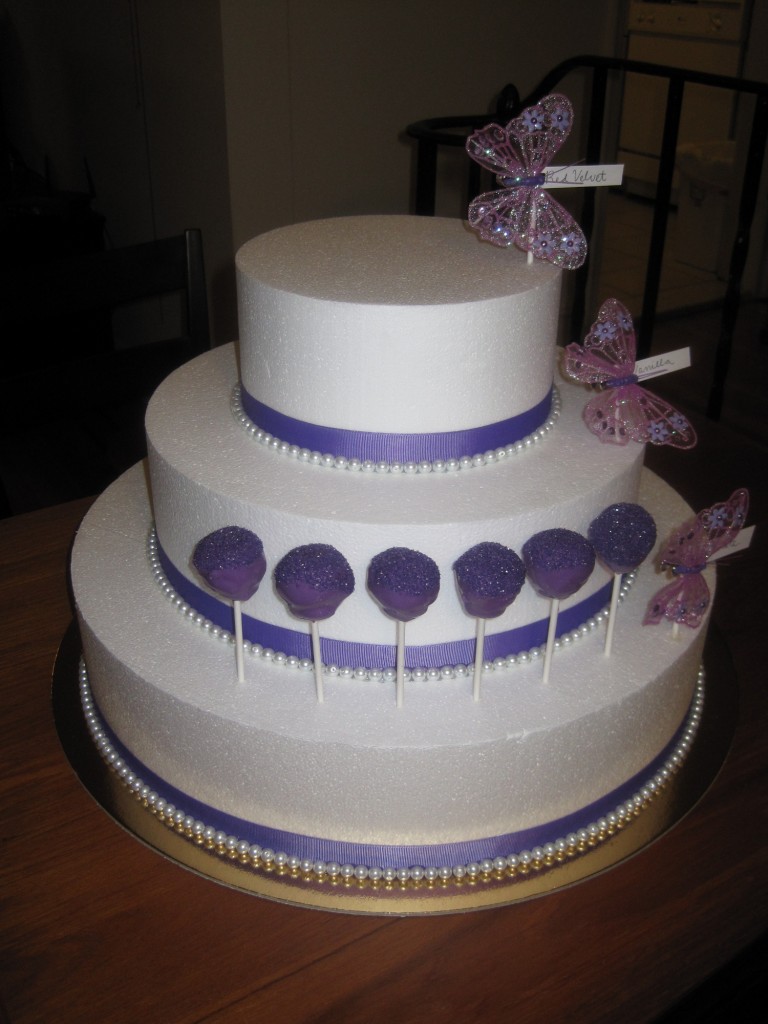
So, my goal was to make a large amount of cake pops, in a bridal theme, and using the colors purple and white to match the color scheme of the shower. I also wanted to incorporate butterflies into the design, as they were integral part of the shower’s theme. I’ll show you my final product first, and then go through how to make them. You’ll get my full account of all my tips, tricks, and mistakes to avoid. And believe me, there are a lot of mistakes to avoid!

Bridal_shower_cake_pops1

Bridal_shower_cake_pops2

Lotto_cake_pops

Bridal_shower_cake_pops3

The wedding cake base:

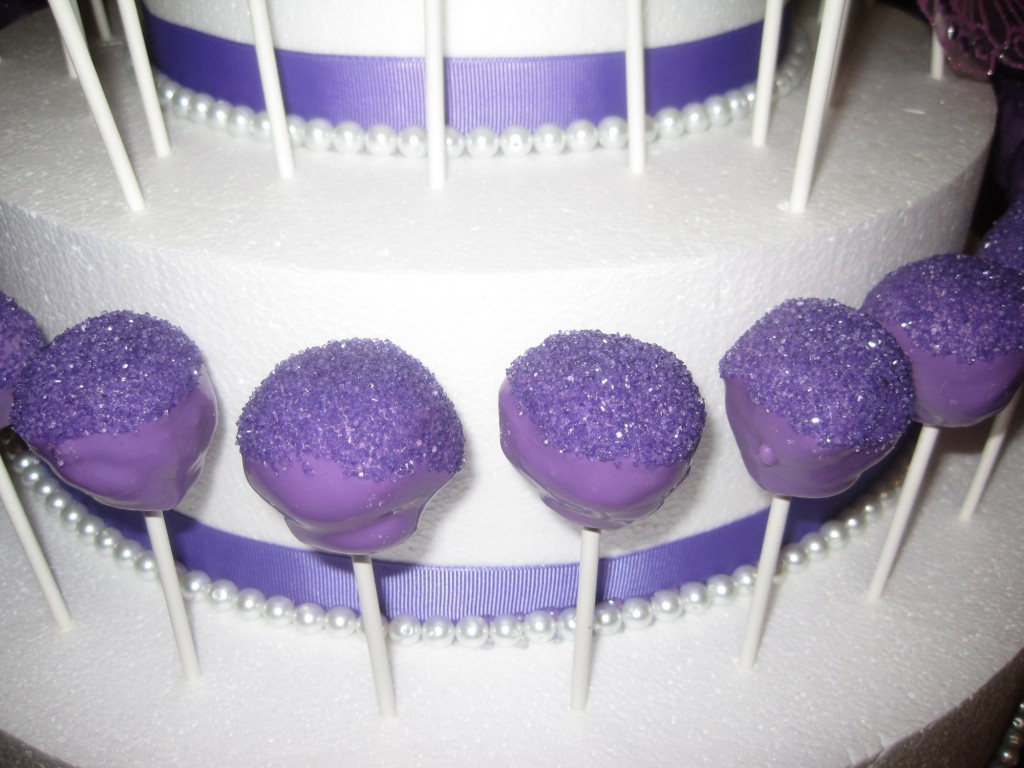
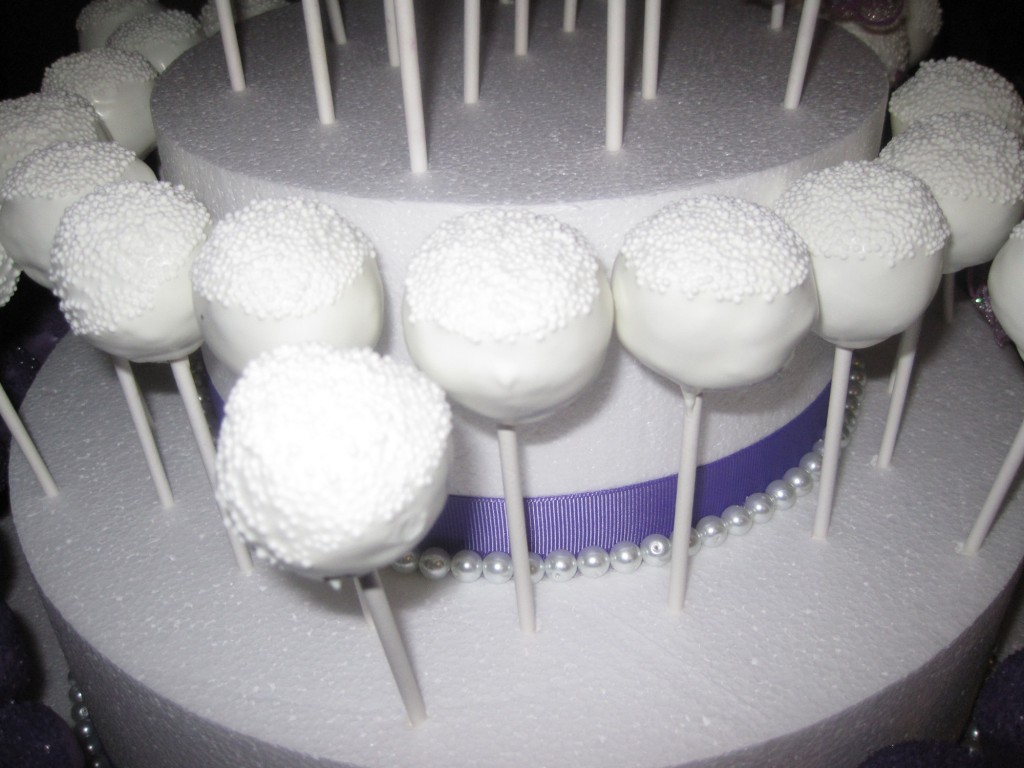
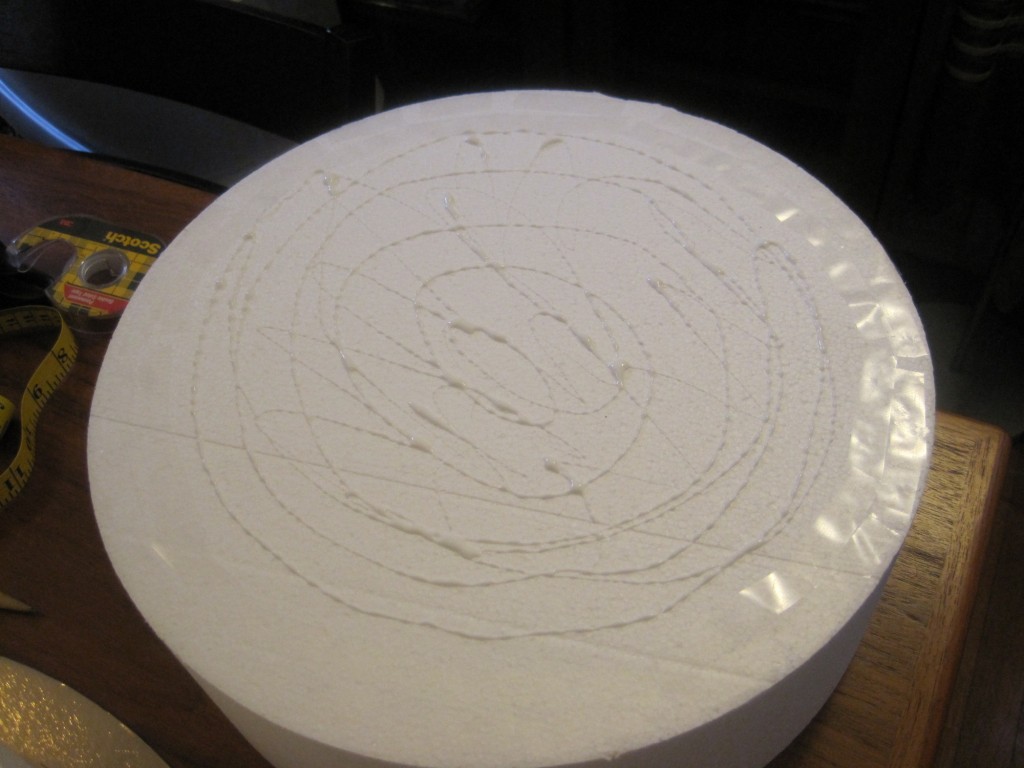
The base was made by using a 20-inch cake board on the bottom for support. Then I added an 18-inch Styrofoam cake dummy for the bottom tier, a 13-inch dummy for the middle tier, and an 8-inch dummy for the top tier. I attached each tier to each other by using double-stick tape on the outer edges and Elmer’s glue in the middle (in the picture it is hard to see the tape, but it is the shiny outer edge of the dummy).

Bridal_shower_cake_pops4

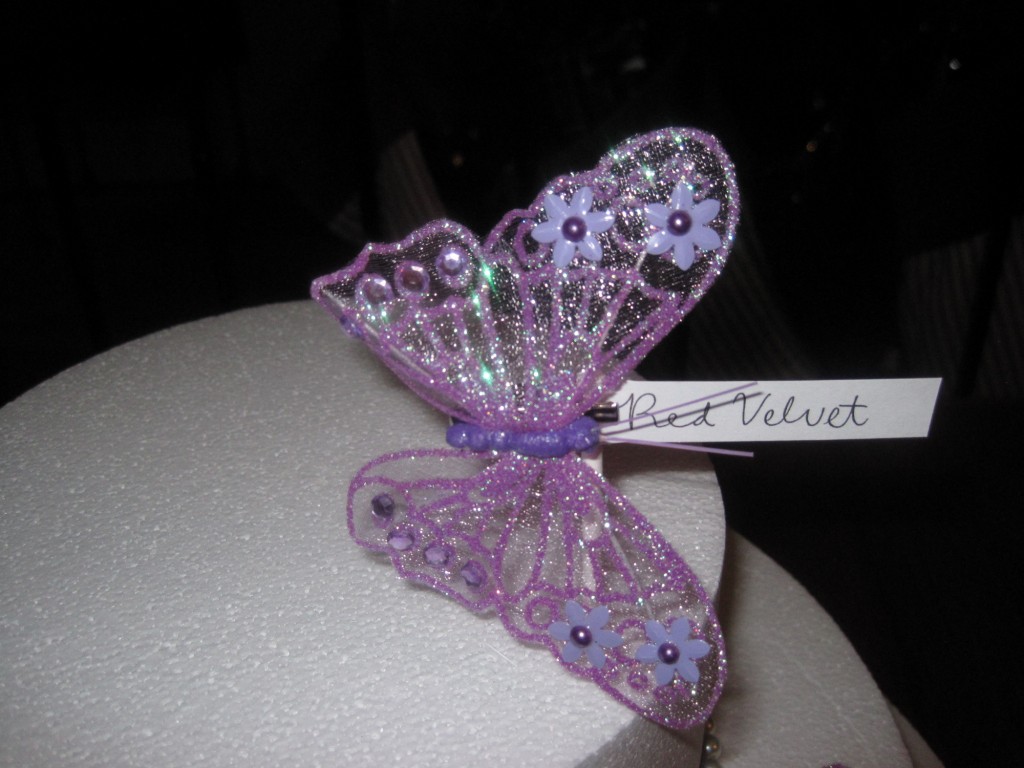
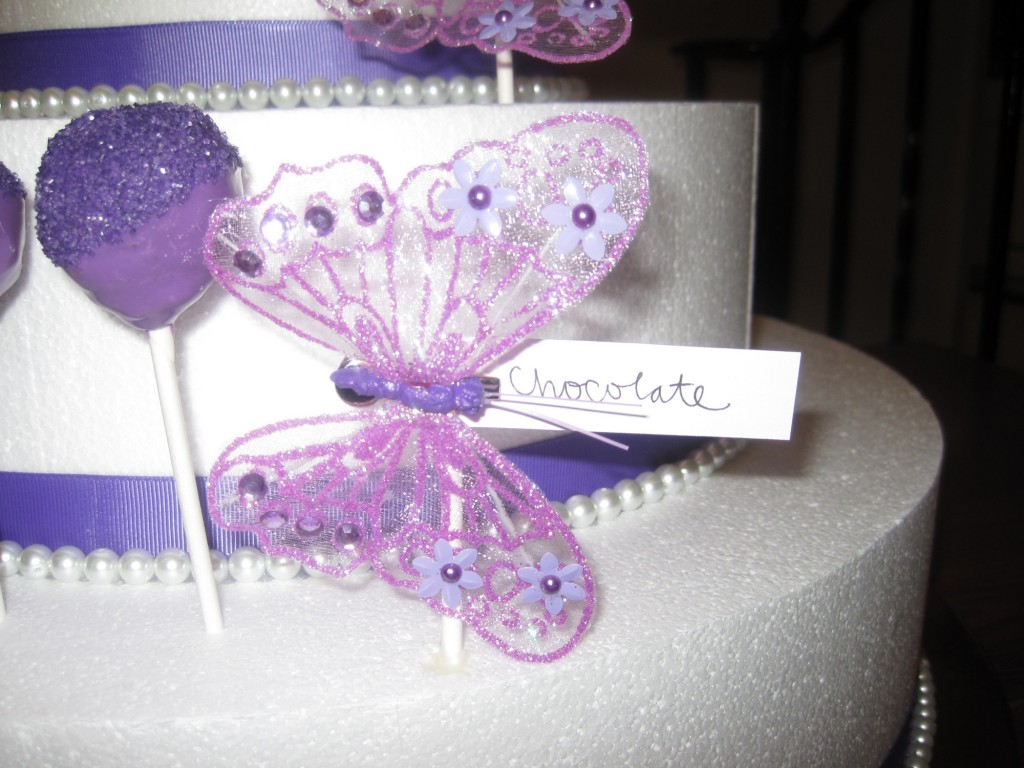
Once I attached all pieces, I used double stick tape to place the ribbon at the base of each tier. Then I used a glue gun to attach single craft pearls to the ribbon. Since each tier held a different flavor of cake pop, I wanted signs to showcase each flavor. I cut a strip of an index card, wrote the flavor name, and used a glue gun to attach this to a lollipop stick. I wrapped the end of the card around the stick and glued it in place. Then, I bought purple butterflies that were attached to alligator clips, and attached them to the sticks.
Bridal_shower_cake_pops5

Bridal_shower_cake_pops6

Bridal_shower_cake_pops7

Then all that was left was to make and attach the cake pops. The cake base held 65 cake pops. I started from the bottom tier and worked my way up. Since it is difficult to stick the lollipop sticks into the Styrofoam, I first made a hole where I wanted to place the pop with the point of a wooden skewer. I made the hole, placed the pop, and repeated all the way around until the tier was filled. Before actually making the next hole, I measured where I wanted the hole to be using a cake pop. That way, the pops didn’t touch one another, and I didn’t waste space by having the pops too far apart.
Bridal_shower_cake_pops8

The cake pops:

Cake pops can basically be any flavor, it’s just a matter of getting the correct cake to frosting ratio. If you use too much frosting, the cake will fall off the stick. If you use too little, the cake will not hold together. The cake and frosting mix should be the consistency of a firm dough. After chilling in the fridge for 20 minutes, the cake balls should be hard.

Bakerella suggested using one box of cake mix and one can of frosting. I have read elsewhere that some people use one box of mix and half a can of frosting. Since I make everything from scratch, I had to experiment. I placed my cake batter into muffin tins (prepared with Wilton cake release) and this way I could determine how much frosting to use per how many cupcakes. Also, this would tell me how many cupcakes I would need to make in order to end up with a yield of 80 cake pops (my original goal).

After some test runs and failures, it turns out that roughly 3/4 cup of frosting per 4 cupcakes produces about the right consistency. However, if your cake contains any oil, I would cut that amount in half when making the cake. In my test run, my chocolate cake contained 1/2 cup of oil, and would not stay on the sticks.

Each cupcake produces 2-3 cake pops, so for each dozen cupcakes I would expect 24-28 pops. I made 3 dozen (one of each flavor) and ended up with about 80 pops.

I made 3 flavors of cake pops: red velvet with cream cheese frosting, chocolate with coffee frosting, and vanilla with vanilla frosting. I covered the pops with Merckins candy melts, and then used nonpariels and colored sugar for decoration.

Instructions to make cake pops:

1. Make your cake directed, in prepared muffin tins.  Make your frosting as directed (For a dozen cupcakes I would make a full recipe of 3 cups but you most likely won’t need it all). Cool the cake for several hours.

2. Tear up the cupcakes with your hands and place in a large bowl (best if you have a Kitchenaid mixer). Let the mixer beat apart the cake until it is completely crumbled.

3. Add the frosting to the cake (about 3/4 cup per 4 cupcakes) a little at a time. Add a little, turn the mixer on, and check. Keep adding a little more, making sure the mixture remains firm. You DO NOT want it to get too soft. Make sure it is fully mixed into one homogenous mixture.

4. Roll the cake mixture into 1.5 inch balls with your hands or use a cookie scoop. Place on a cookie sheet lined with wax paper and chill for 20 minutes, or until hard.

5. Melt a little of the white Merckins melts in a Pyrex measuring cup. Microwave for 30 seconds, and then 15 second intervals, mixing in between. You can use Paramount crystals to thin it out if the chocolate seems too thick (about 1 tablespoon per pound of chocolate).

6. Dip the end of the lollipop stick into the chocolate and place less than halfway through the cake ball. Give it a little twist. This should result in a button of white chocolate around the lollipop stick. Place in fridge for 10 minutes until the white chocolate is dry.

Bridal_shower_cake_pops9

7. Make sure you let the pops warm to room temperature before dipping. Otherwise, the chocolate may crack. Melt enough chocolate in a measuring cup so that you can submerge the pop without touching the sides or bottom of the cup.

8. Dip the pop in the chocolate and then gently tap the end of the stick on the side of the cup, letting the excess chocolate drip off. Wait about 20 seconds for the chocolate to dry, then dip in the sugar or nonpariels for decoration. If you do it too soon, it may dislodge the chocolate.

9. Stick the pop upright into a piece of Styrofoam in the fridge and let it dry before putting away. Once they are dry, they can be placed in a Tupperware container in the fridge. Just make sure the container is closed so that when you take them out they do not sweat.

Some tips:

My test run pops actually came out better than the ones I made for the shower. Since my first batch of chocolate pops fell off the sticks, I was so worried about using too much frosting that I ended up using too little. The cake didn’t stay together too well, and  once I started tapping the stick to get rid of excess chocolate, the cake would fall off. Luckily, my husband had the idea to put some melted chocolate in a squeeze bottle and reinforce the sticks.  This helped a lot, and I only ended up with a few casualties. So this is something you can do if you have the same problem. Basically, reinforce around where the chocolate button is, extending out onto the cake. Let it harden in the fridge before dipping. This will prevent the cake from separating from the stick.

Another tip is to not worry about dripping. If the chocolate drips down the stick, just wait until it is fully dried. Then you can take a damp paper towel and wipe the stick clean. If you try cleaning it while it is still wet, you will end up with a mess.

Lastly, decorating with sprinkles or sugar really helps to cover up imperfections. So if your chocolate is lumpy and you can’t get it to the right consistency, dip the whole thing in sprinkles. It will not only look cute, but no one will be able to tell that you ever had a problem.

Happy baking!!

Posted in Cake Pops | 2 Comments

Christmas Loot! Some cool baking stuff I received.

I hope everyone had a great holiday! I know I did. It was just a nice, relaxing day with family. But who am I kidding? Getting presents is fun too! I just wanted to share some of the cute baking stuff that my family got me.

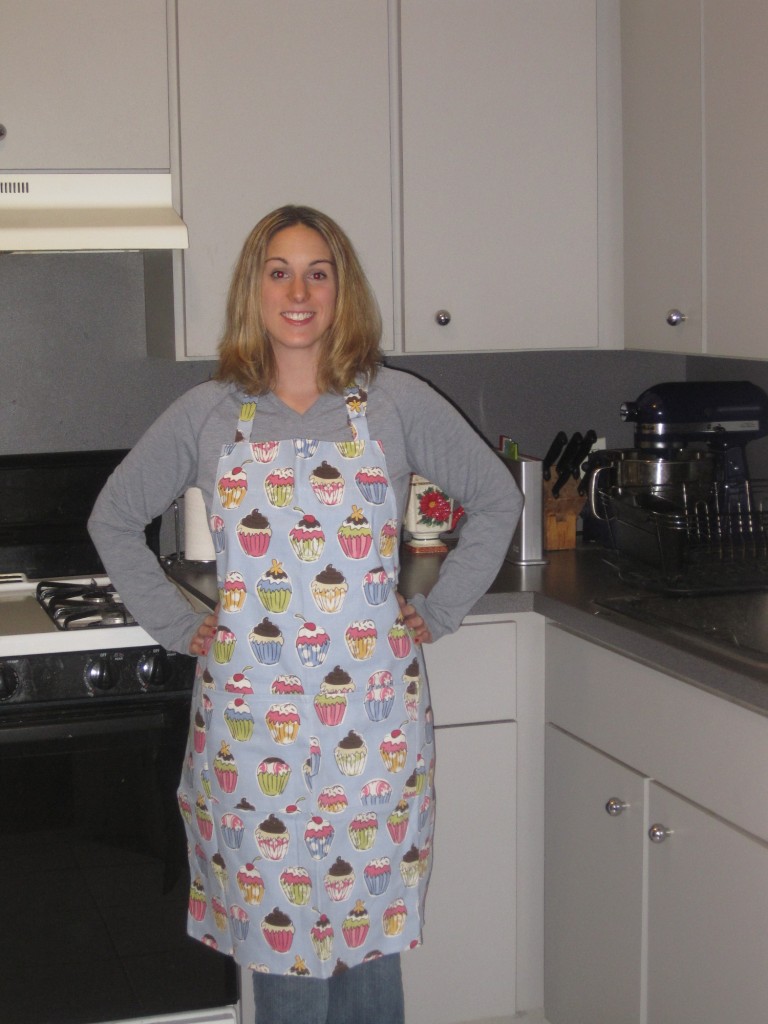
This cupcake apron is so adorable. I love the print, and the fact that it’s blue (one of my favorite colors).

Xmas_2011_loot1

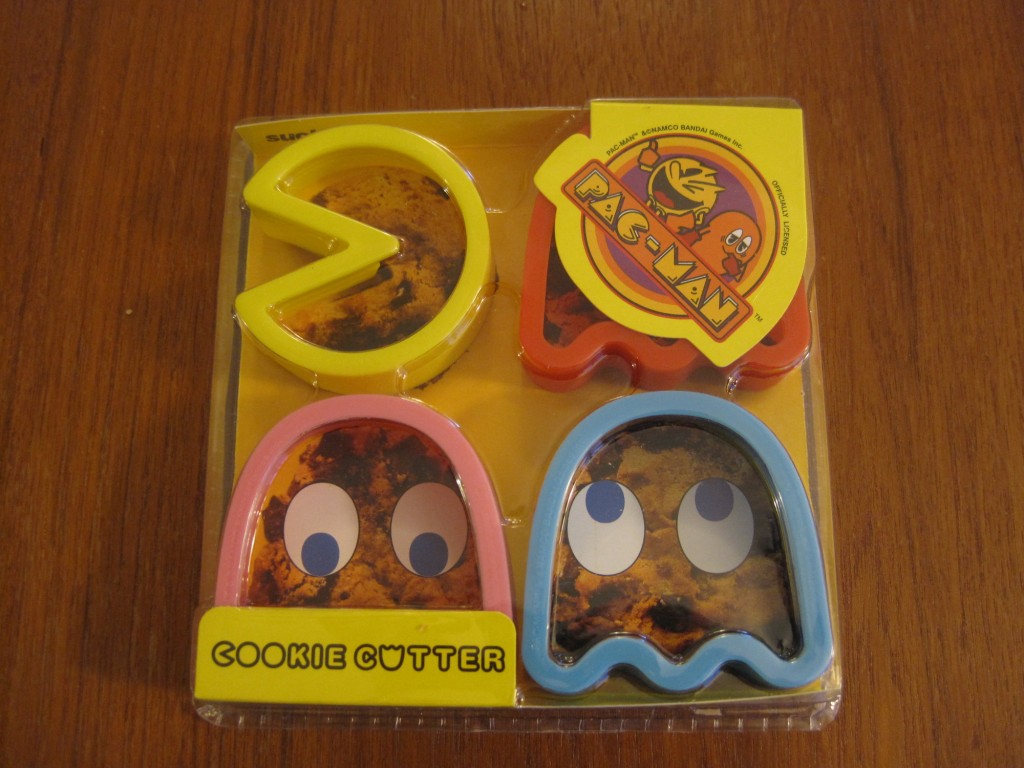
I also got these really cool Pac Man Cookie Cutters. Now I just have to get pink, blue, and yellow decorating sugar (I already have red) to make Pac-Man sugar cookies! Poor Clyde got left out, but I guess I could make a couple orange ones too.

Xmas_2011_loot2

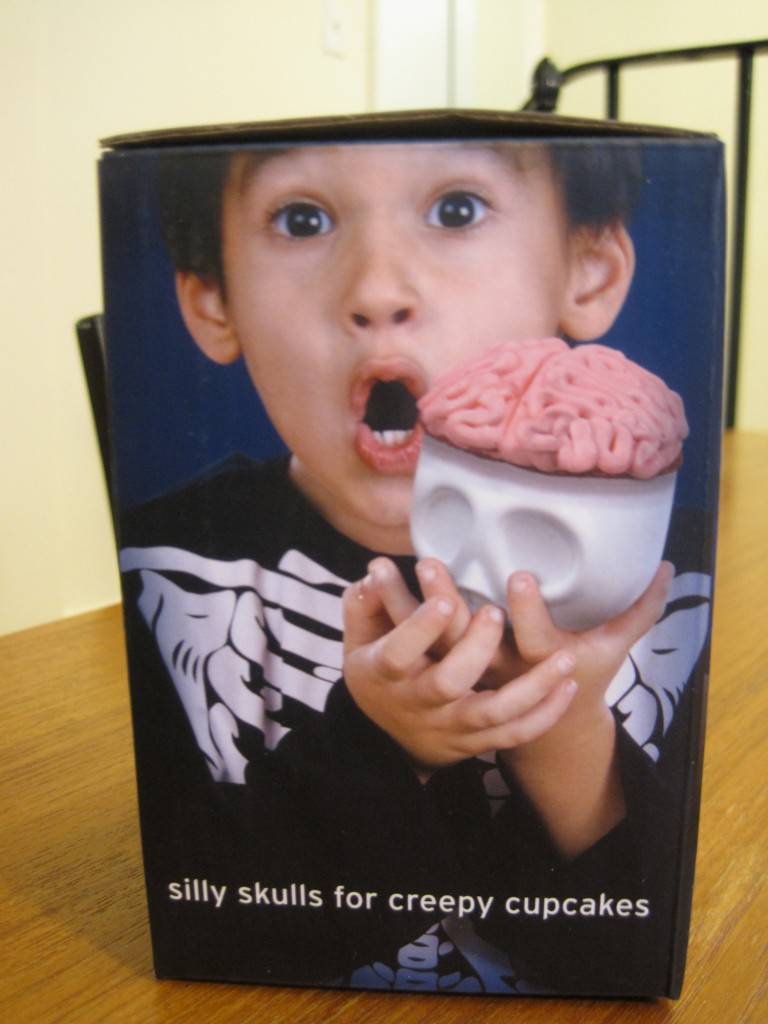
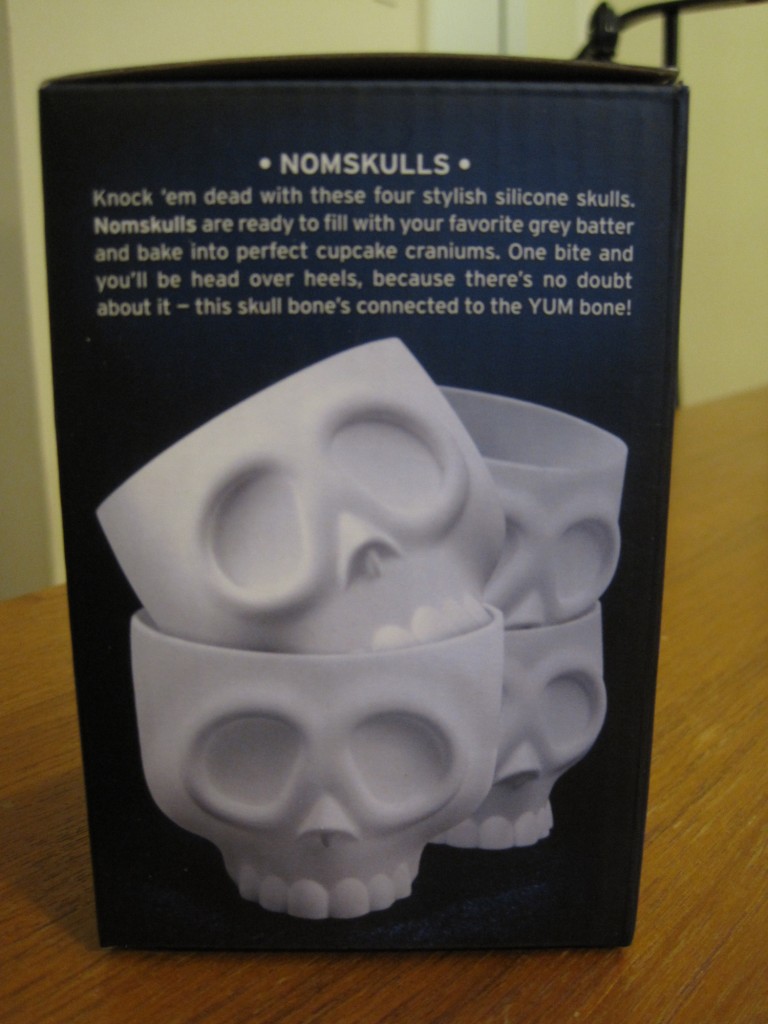
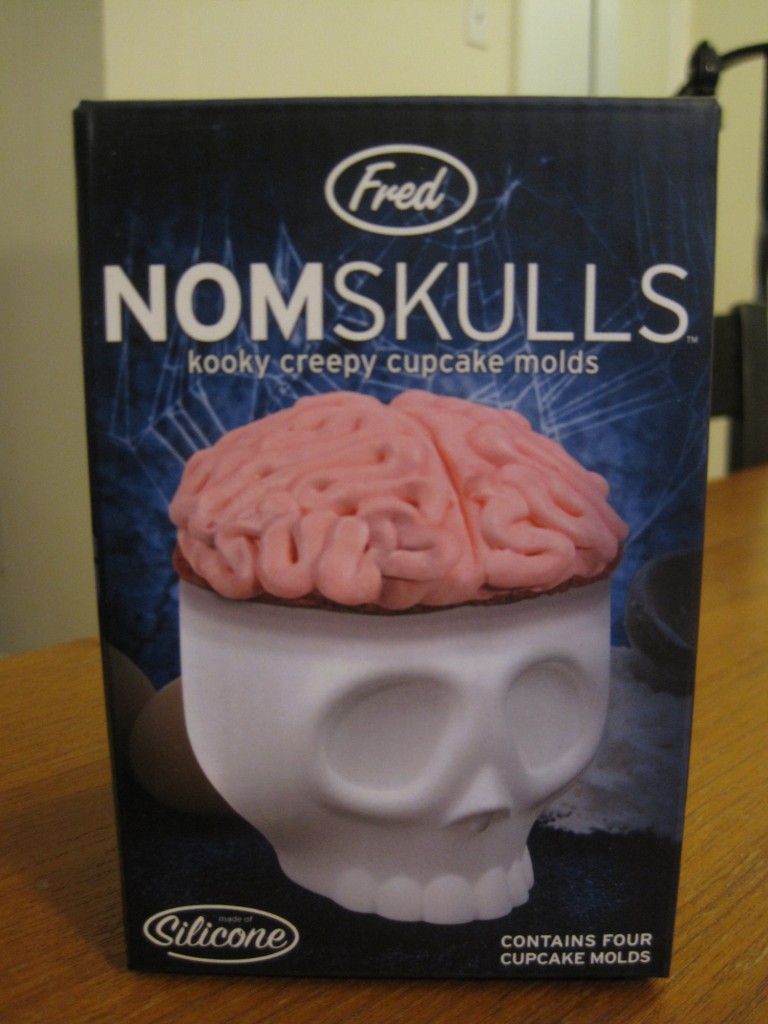
And last but not least…I received these cool skull cupcake molds! Being a former neuroscientist, I actually saw these before and really wanted them. But they were sold out. Imagine my surprise when I opened them on Christmas day! They are perfect for Halloween (or anytime really, if you like brains). A little pink icing and they will look perfect!

Xmas_2011_loot3

Xmas_2011_loot4

Xmas_2011_loot5

So thank you to Anna Marie, Dennis, and Michelle for my awesome baking-themed gifts!! I can’t wait to use them!

Posted in Miscellaneous | Comments Off on Christmas Loot! Some cool baking stuff I received.