Marshmallow Fondant

After years of decorating mainly with buttercream, I recently decided to take the plunge into using fondant for my cakes. I was always hesitant, since many people don’t like the taste fondant. However, a friend told me that marshmallow fondant was easy to make and tasted way better than the store-bought stuff. So I looked it up online and decided to give it a shot.

It’s amazing how two recipes can have the same ingredients in the same amounts, but turn out wildly different because of the instructions.  My first attempt was a complete mess. I ended up with a dry, crusty mass that looked nothing like fondant. When I added some water, I ended up with wallpaper paste. That batch went into the trash, and I went back to the internet to find some clues as to where I went wrong.

I found a great two-part tutorial on marshmallow fondant (part 1; part 2) that used a Kitchenaid mixer to do all the work. She went step by step through the whole process, and even told me which things to grease with crisco so the marshmallow’s don’t stick (a fatal flaw in my first recipe). Making fondant requires a LOT of kneading, so definitely use a stand mixer if you have one.

I’m going to go through the steps here, in case you don’t want to take the time to watch the video.

Marshmallow Fondant (recipe from About.com)

Makes 1.5 lbs of fondant

8 ounces miniature marshmallows (4 cups not packed)
4 cups confectioners sugar
2 TBSP water
Food coloring or flavored extracts, optional

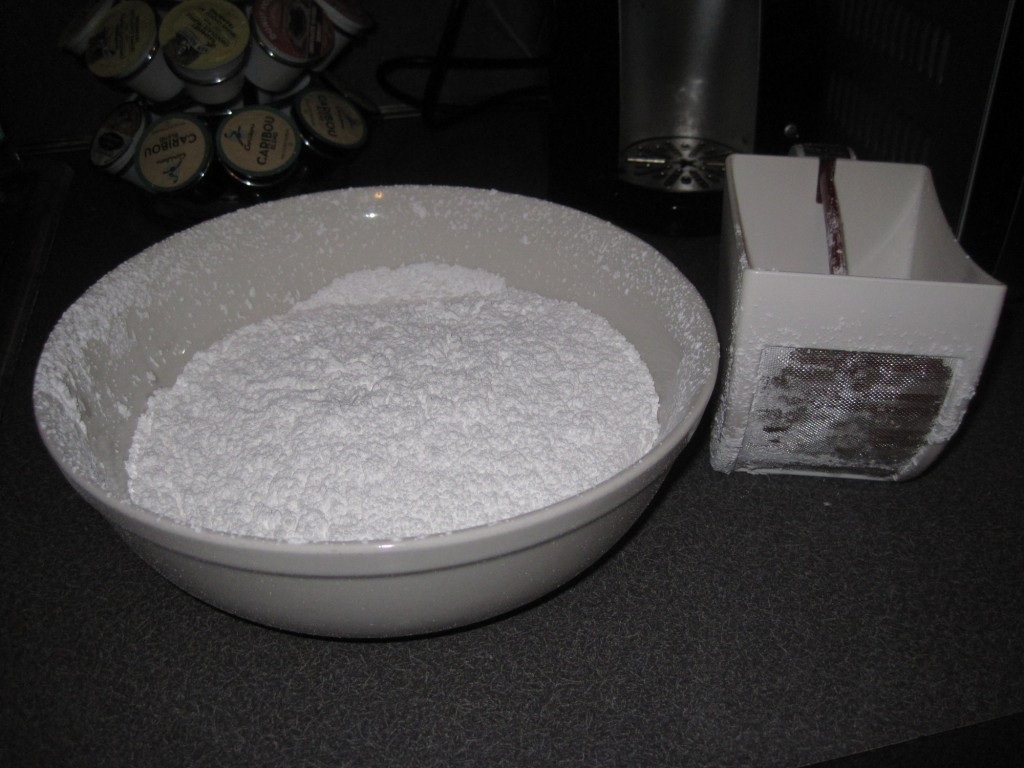
1. Sift the 4 cups of confectioner’s sugar into a bowl. It is really important that the sugar is sifted, so you don’t get large clumps in your fondant. I have the Cuisipro Scoop and Sift Flour Sifter and it’s great. It makes a little mess, so sift over a large bowl if you can.

Fondant1

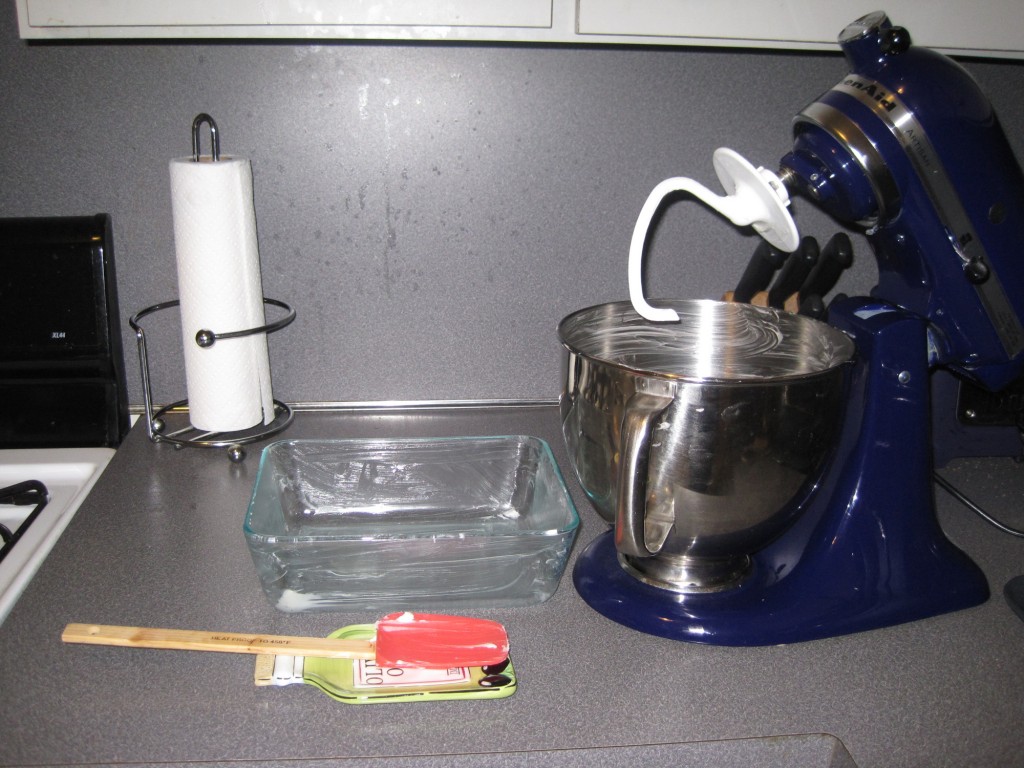
2. Grease EVERYTHING that will come in contact with the marshmallows: the bowl you use to microwave the marshmallows, the rubber spatula you use to stir, the Kitchenaid mixer bowl, and the Kitchenaid dough hook.

Fondant2

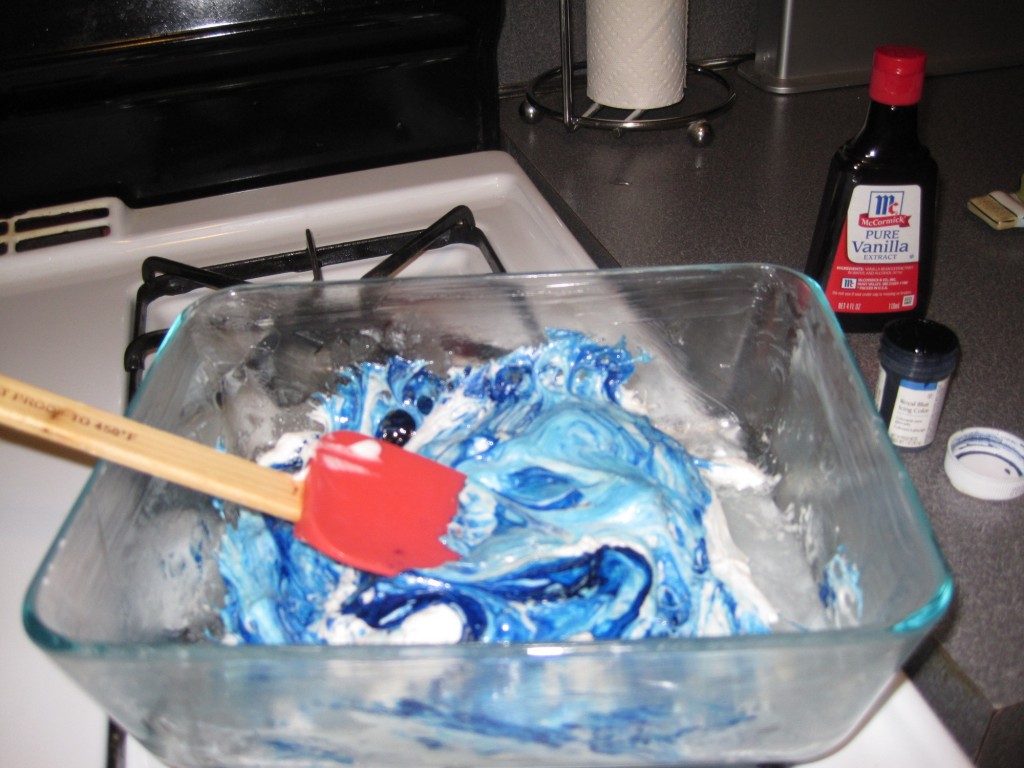
3. Put the marshmallows and water in a microwave bowl and microwave for 1 minute. Stir the marshmallows with the greased spatula and add any color or flavoring that you want. I added blue coloring and vanilla in this case.

Fondant3

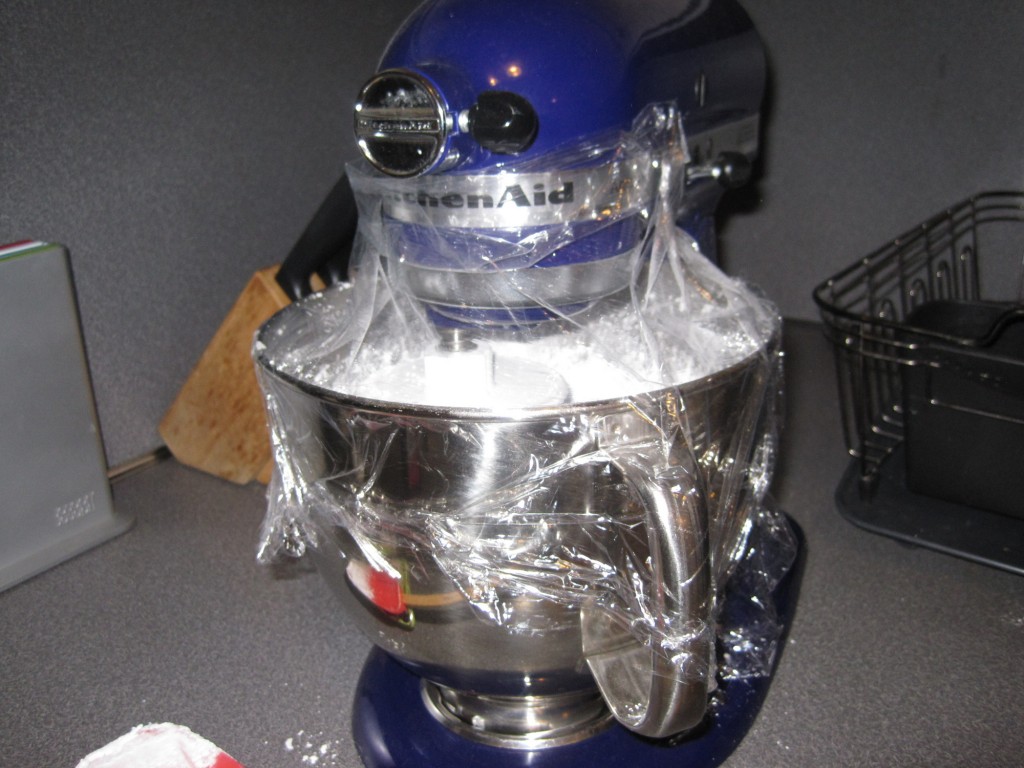
4. Add 3 cups of the sifted confectioners sugar into the mixer bowl. Add the marshmallows. Mix on medium speed until most of the sugar is incorporated. It should still be sticky. To prevent a huge mess on your counter, wrap the mixer and bowl in plastic wrap while it is mixing.

Fondant4

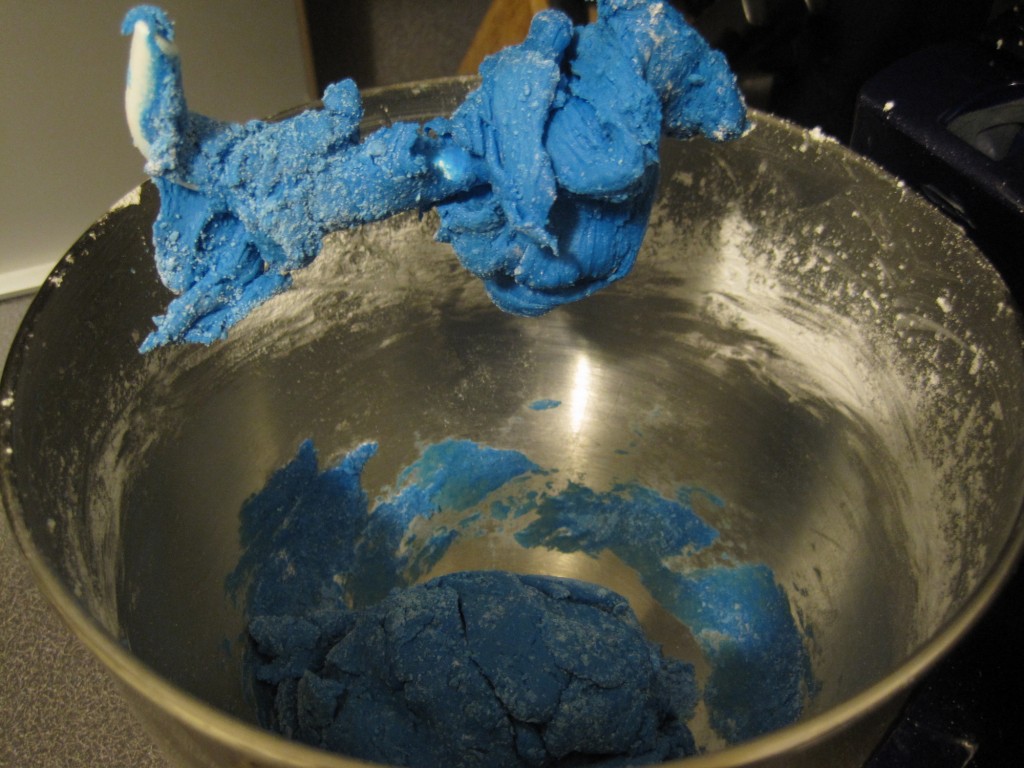
5. Add about 3/4 cup more confectioners sugar, and mix again, until this sugar is incorporated into the mixture. In the end, the fondant should be firm and not sticky. There will be a little bit of sugar that is not mixed in, and that is normal.  It should look like this:

Fondant5

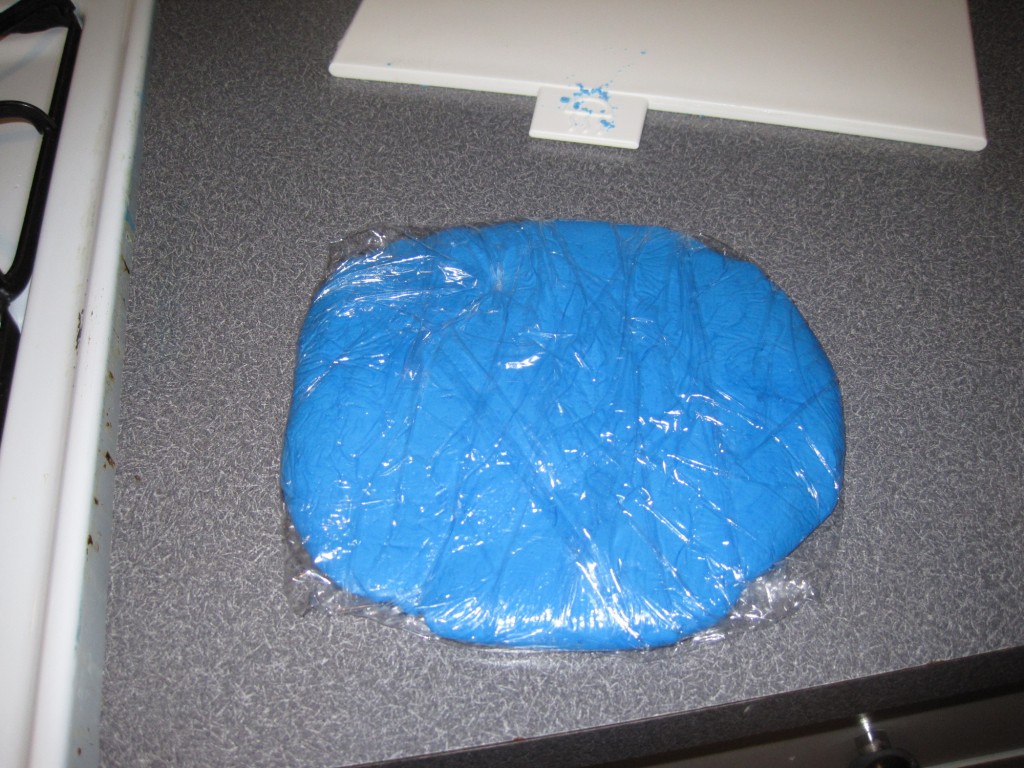
6.  Grease your working surface and hands with Crisco and take the fondant out of the mixer. Kneed onto the surface until all the sugar is mixed in, and the fondant is firm and shiny. Wrap in plastic wrap and put in the fridge for a few hours.

Fondant6

The remaining confectioners sugar will be used to cover the silicone mat you will use to roll out the fondant. I highly recommend getting a silicone mat and fondant rolling pin, as this makes it so much easier to get the fondant to your desired thickness. Remember to keep picking up the fondant after rolling it every so often so it does not stick to the mat.

Posted in Frostings/Icings, Tutorials | Comments Off on Marshmallow Fondant

Angry Birds Cupcakes

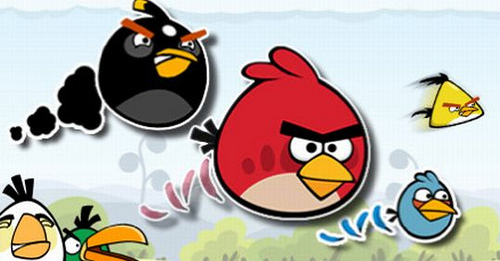
I love all things Angry Birds. I love the games, the round stuffed animals, and all the cakes posted on the Angry Birds Facebook fan page . Having just made pig cupcakes (even if they were pink instead of green), I decided to try my hand at Angry Birds cupcakes. If you don’t know what Angry Birds are, see the picture below…AND GET THE GAME FOR YOUR PHONE!! It’s highly entertaining and addicting.

I decided to make my three favorite birds: The black bomb birds, the classic red birds, and the super-fast yellow birds. Not only did I make the cupcakes look like the birds on the outside, but I also flavor-coded them so they matched on the inside. The black birds were chocolate cake with chocolate icing, the red birds were red velvet cake with cream cheese icing, and the yellow birds were lemon cake with lemon icing. I’ll go through each bird separately to show you the recipe and how I made them.

Black Bomb Birds:

Three_black_birds
Black_bird

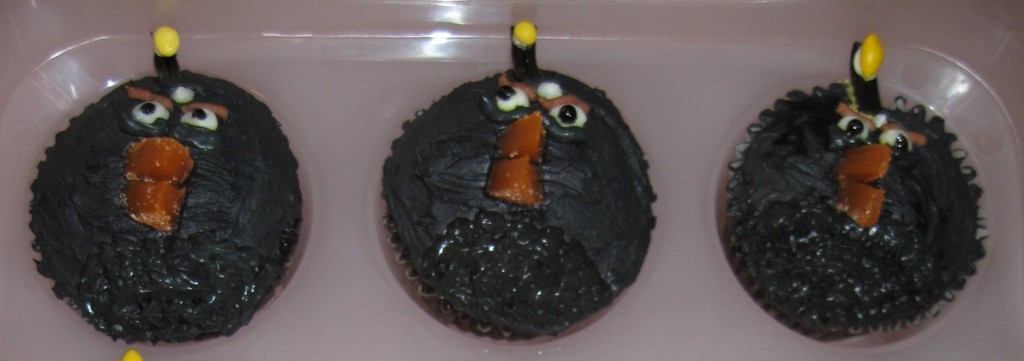
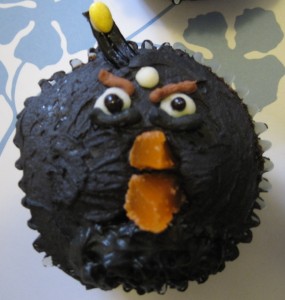
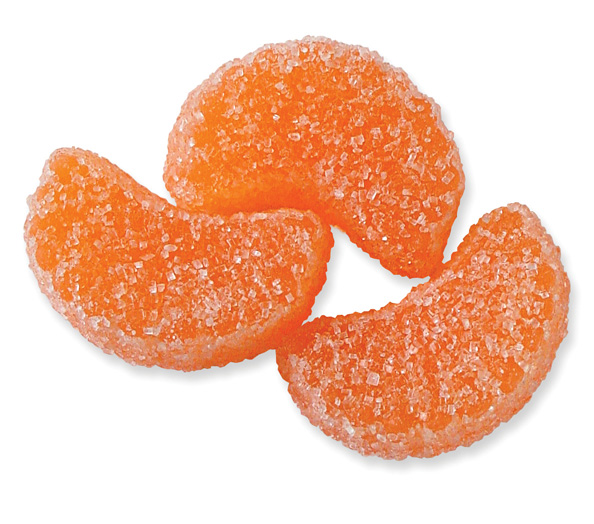
These guys were my favorite to make. I added some black coloring to chocolate frosting to make it the correct color. This is much easier than adding black to white frosting. I used an angled cake spatula to add the frosting to the entire cupcake. Then I used a #16 star tip to add some fluffy chest feathers at the bottom. The beak was made out of orange gummy slices. I just cut triangle shapes with a pair of scissors. It was tricky, since the scissors tended to get sticky.

The eyes, bags under the eyes, eyebrows, and reflective spot were made from buttercream. I used glitter gel to dot the pupils. Lastly, the fuse was made from a licorice stick and the flame was made from a candy-coated sunflower seed. I glued the seed to the licorice with royal icing. The beak and fuse were placed on the cupcake while the frosting was soft. Once everything was in place, I put them in the fridge for everything to harden up.

Extreme Chocolate Cake (from Allrecipes.com)

Makes two 9-inch cakes, or 12 cupcakes
Ingredients
  • 2 cups white sugar
  • 1 3/4 cups all-purpose flour
  • 3/4 cup unsweetened cocoa powder
  • 1 1/2 tsp baking soda
  • 1 1/2 tsp baking powder
  • 1 tsp salt
  • 2 eggs
  • 1 cup milk
  • 1/2 cup vegetable oil
  • 2 tsp vanilla extract
  • 1 cup boiling water
Instructions
  1. Preheat oven to 350 degrees. In a medium bowl, stir together the sugar, flour, cocoa, baking soda, baking powder and salt. Add the eggs, milk, oil and vanilla, mix for 3 minutes with an electric mixer. Stir in the boiling water by hand.
  2. Bake for 17-20 minutes for cupcakes, or 30-35 minutes if making a cake. Either way, you know it is done when a toothpick inserted in the center comes out clean.


Chocolate Buttercream Frosting (from Allrecipes.com)

Makes about 1.5 cups of frosting
Ingredients
  • 1/4 cup butter
  • 2 cups confectioners sugar
  • 3 TBSP cocoa powder
  • 1 tsp vanilla extract
  • 2 TBSP milk
Instructions
  1. Cream together the butter and confectioner’s sugar in a mixer until fluffy. Add the cocoa powder, vanilla, and milk. Mix for an additional 3-4 minutes until smooth. If you want your frosting to be thinner and easier to spread, add a little more milk gradually.


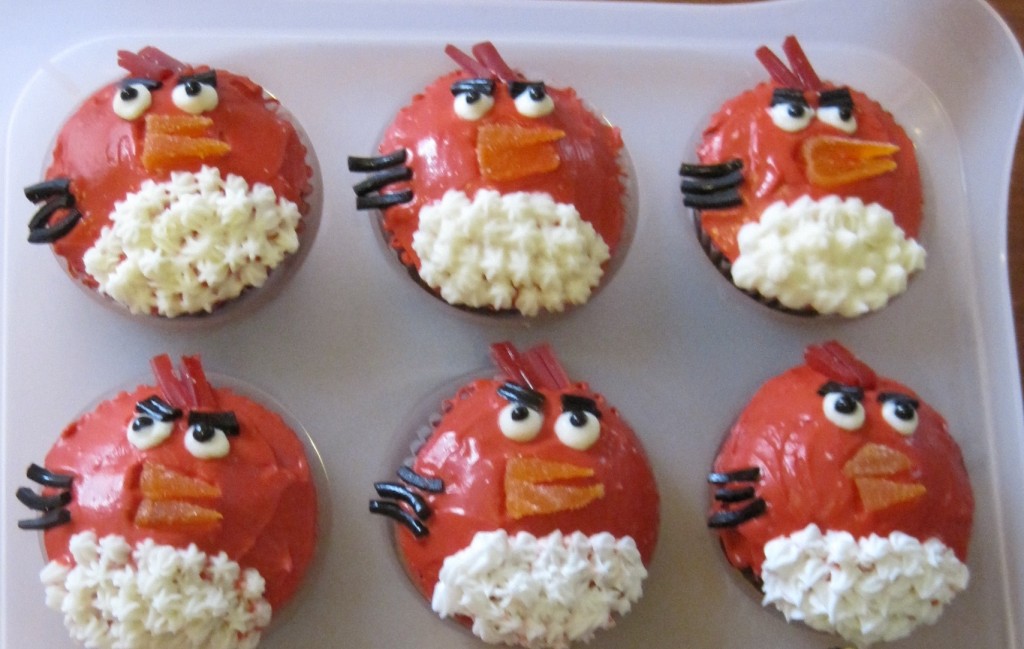
Classic Red Birds

Red_birds

These guys were made very similarly to the black birds, except I turned their beaks on the side instead of having them stick straight up. Licorice was used for their tail feathers, head feathers, and eyebrows. For these guys, the chest feathers ended up looking like beards. So next time I would just spread it smooth with a knife instead of using the star tip.

Red Velvet Cupcakes (from McCormick)

Makes 30 cupcakes
Ingredients
  • 2 1/2 cups flour
  • 1/2 cup unsweetened cocoa powder
  • 1 teaspoon baking soda
  • 1/2 teaspoon salt
  • 1 cup butter, softened
  • 2 cups sugar
  • 4 eggs
  • 1 cup sour cream
  • 1/2 cup milk
  • 1 (1 ounce) bottle red food color
  • 2 teaspoons vanilla extract
Instructions
  1. Preheat oven to 350 degrees. Mix flour, cocoa powder, baking soda and salt in medium bowl. Set aside.
  2. Beat butter and sugar in large bowl with electric mixer on medium speed 5 minutes or until light and fluffy. Beat in eggs, one at a time. Mix in sour cream, milk, food color and vanilla. Gradually beat in flour mixture on low speed until just blended. Do not over beat. Sp
  3. Bake 20 to 25 minutes or until toothpick inserted into cupcake comes out clean


Cream Cheese Frosting (from Allrecipes.com)

Makes 1.5-2 cups of frosting
Ingredients
  • 2 (8 ounce) packages cream cheese, softened
  • 1/2 cup butter, softened
  • 2 cups sifted confectioners sugar
  • 1 tsp vanilla extract
Instructions
  1. In a mixer, cream together the cream cheese and butter until creamy. Mix in the vanilla, then gradually add in the confectioners’ sugar. Store in the refrigerator after use.


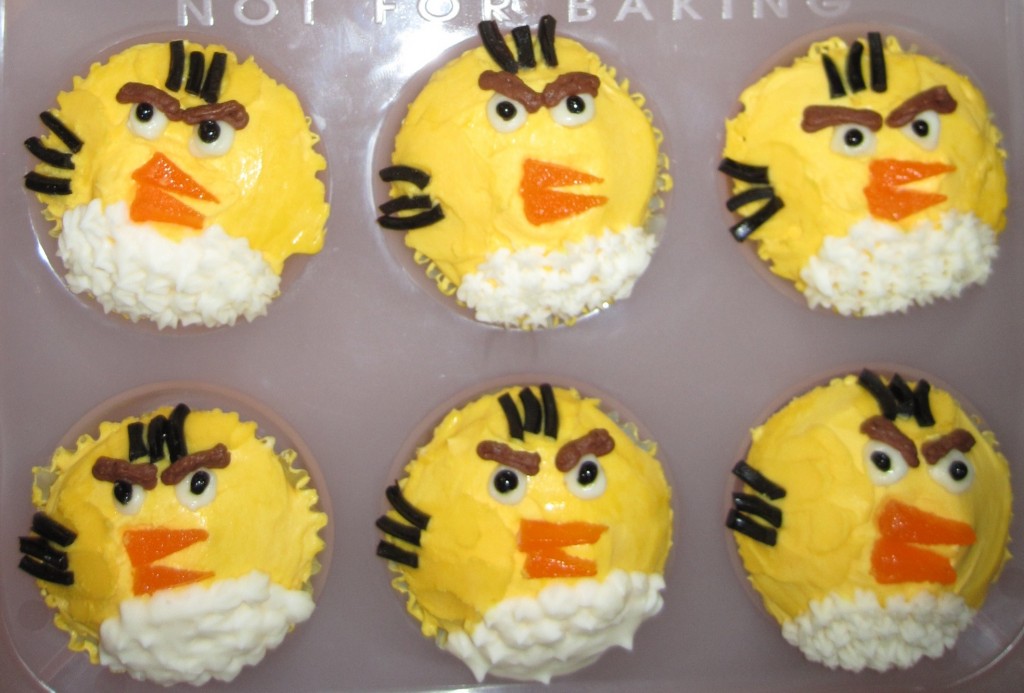
Super-fast Yellow Birds:

Yellow_birds

These guys are nearly identical to the red birds, except I used black licorice for their head feathers, and their eyebrows are made from chocolate buttercream. They are normally a triangular shape in the game, but it is difficult to shape cupcakes, so I kept them round.

Lemon Cupcakes (modified from Joyofbaking.com)

Makes 12 cupcakes
Ingredients
  • 1 1/2 cups all purpose flour
  • 1 1/2 tsp baking powder
  • 1/4 tsp salt
  • Zest of 1 lemon (I highly recommend fresh zest. You can get a zest tool in any kitchen store)
  • 1/2 cup unsalted butter, room temperature
  • 2/3 cup white sugar
  • 3 large eggs
  • 1 tsp vanilla extract
  • Juice of one lemon
  • 1/4 cup milk
Instructions
  1. Preheat oven to 350 degrees and line 12 muffin cups with paper liners.
  2. In a separate bowl whisk together the flour, baking powder, salt, and lemon zest.
  3. In the bowl of your electric mixer, or with a hand mixer, beat the butter and sugar until light and fluffy. Add the eggs, one at a time, beating well after each addition. Beat in the vanilla extract. Squeeze in the lemon juice.
  4. With the mixer on low speed, alternately add the flour mixture and milk, in three additions, beginning and ending with the flour. Scrape down the sides of the bowl as needed.
  5. Evenly fill the muffin cups with the batter and bake for about 17 – 20 minutes or just until set and a toothpick inserted into a cupcake comes out clean.


Lemon Buttercream Frosting (my own recipe)

Makes 1.5 cups of frosting
Ingredients
  • 1/2 cup unsalted butter, softened
  • 1 1/2 tsp vanilla extract
  • 3 cups confectioners sugar
  • 2-3 tablespoons milk
  • Juice from one lemon
Instructions
  1. Cream room temperature butter with a hand mixer, the paddle attachment of a stand mixer, or a wooden spoon until smooth and fluffy. Gradually beat in confectioners’ sugar until fully incorporated. Beat in vanilla extract. Add milk and lemon juice, and beat for an additional 3-4 minutes.


General Tips:

1. Eyebrows are very important here. Make them thick and inverted inward. This is really the key to  making the birds look angry

2. For the red and yellow birds, start the faces fairly low on the cupcake since they have big foreheads. I neglected to do this.  I thought my cupcakes looked like birds that were angry, but not necessary Angry Birds. I think they would have looked a lot more like the characters if they had some forehead space between the head feathers and where the eyebrows started.

Posted in Cupcakes, Frostings/Icings | 1 Comment

Oink!!

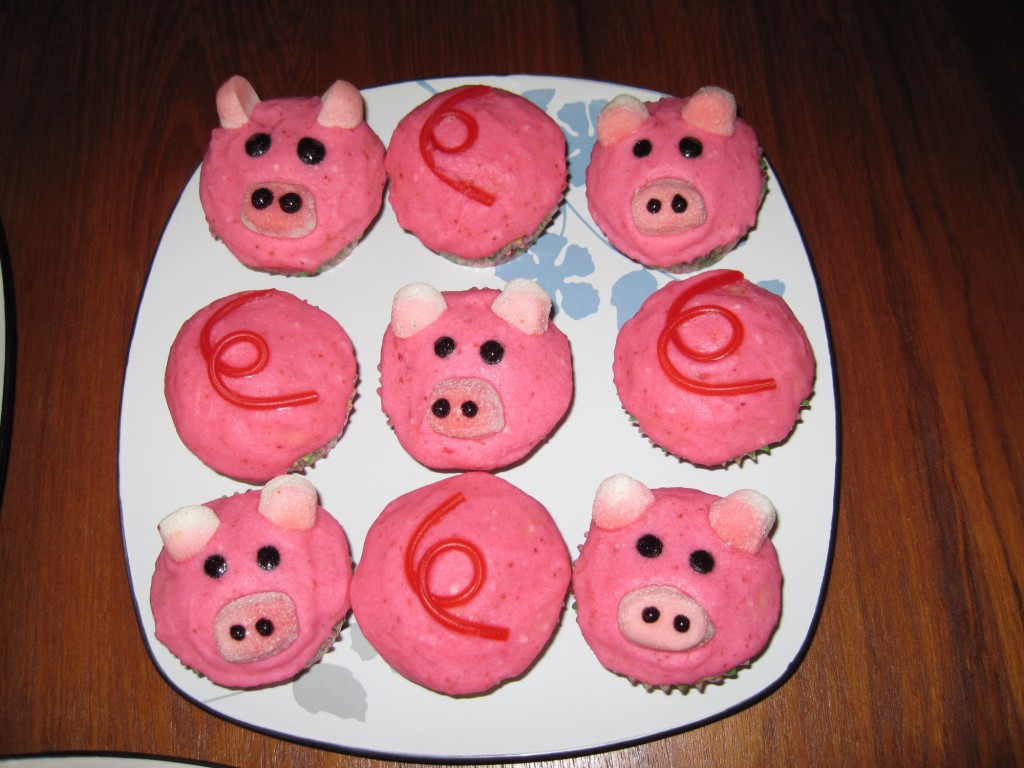
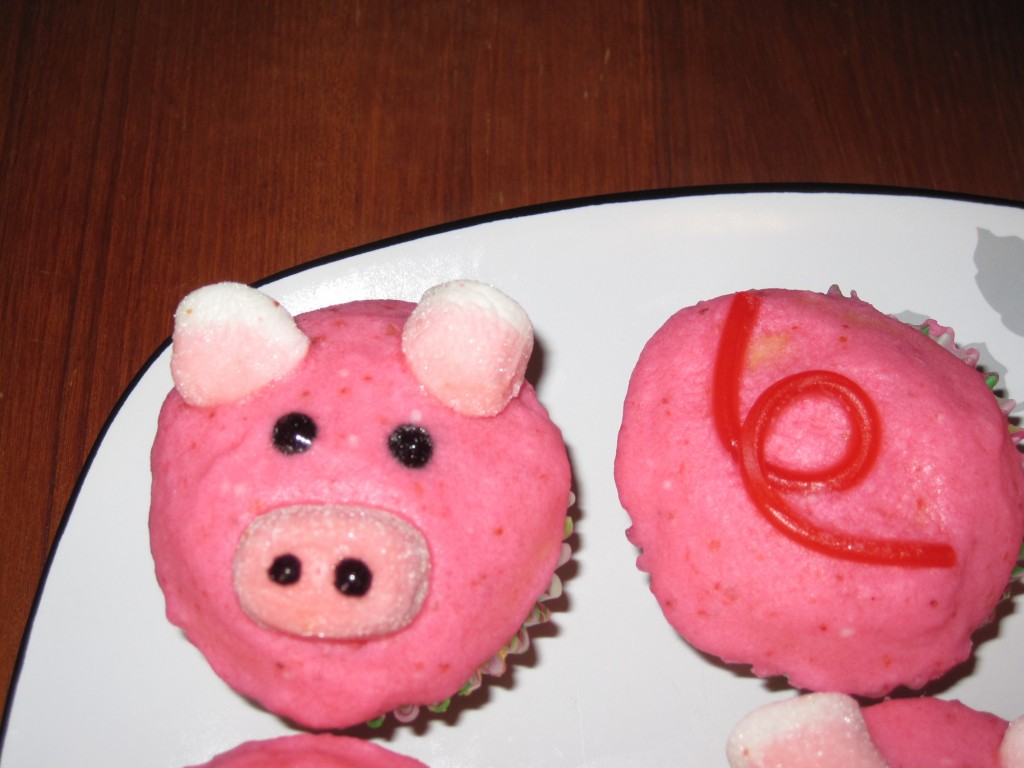
We were invited to a pig roast this past August, and so I got really excited to make pig cupcakes. I had seen lots of pig cupcakes before, but they were always faces. I had the idea to make to make pig faces AND pig butts (complete with curly tail!). It turned out that Hurricane Irene came that weekend, so we decided not to go to the roast. But, there was no way I could NOT make these cupcakes. I loved the idea way too much. So I made them for the following weekend, when we attended a football party. Footballs are called pigskins, so it actually went with the theme (even if it was a little stretch).

Pig_cupcakes1

Pig_cupcakes2

I used a basic vanilla cupcake recipe, and topped it with strawberry buttercream icing.

Vanilla Cupcakes (from Joyofbaking.com)

Makes 12 Cupcakes
Ingredients
  • 1/2 cup unsalted butter, room temperature
  • 2/3 cup white sugar
  • 3 large eggs
  • 1 tsp vanilla extract
  • 1 1/2 cups all purpose flour
  • 1 1/2 tsp baking powder
  • 1/4 tsp salt
  • 1/4 cup milk
Instructions
  1. Preheat oven to 350 degrees and line 12 muffin cups with paper liners.
  2. In the bowl of your electric mixer, or with a hand mixer, beat the butter and sugar until light and fluffy. Add the eggs, one at a time, beating well after each addition. Beat in the vanilla extract.
  3. In a separate bowl whisk together the flour, baking powder, and salt.
  4. With the mixer on low speed, alternately add the flour mixture and milk, in three additions, beginning and ending with the flour. Scrape down the sides of the bowl as needed.
  5. Evenly fill the muffin cups with the batter and bake for about 17 – 20 minutes or just until set and a toothpick inserted into a cupcake comes out clean.


Strawberry Buttercream Frosting (my own recipe)

Makes 3 cups of frosting
Ingredients
  • 1 cup unsalted butter, softened
  • 4 cups confectioners sugar
  • 3 tsp vanilla extract
  • 2-3 TBSP milk
  • 1/2-1 cup of frozen strawberries, depending on your preference
Instructions
  1. Grind frozen strawberries in a food processor until they are finely ground (do not defrost).
  2. Cream room temperature butter with an electric mixer until smooth and fluffy. Gradually beat in confectioners’ sugar until fully incorporated. Beat in vanilla extract. Pour in milk and strawberries and beat for an additional 3-4 minutes. Since frozen strawberries add water to the recipe, use only 2 TBSP milk if using a full cup of strawberries.


You will end up with a light pink frosting. If you want a more shocking pink, you can add coloring right to the recipe and have the mixer do all the work for you.

Once the frosting is the right color, frost all cupcakes. Then dip a knife in hot water, wipe off with a paper towel, and smooth over the frosting of one cupcake. This will give a nice, smooth appearance. Repeat for all cupcakes.

Next are the details. I’m a big fan of using candy for details. Normally, after frosting a cake I would put it in the fridge to harden up before decorating. In this case, I would put all the details on FIRST, and then put in the fridge. You want to put all the candy on while the frosting is soft and a little sticky.

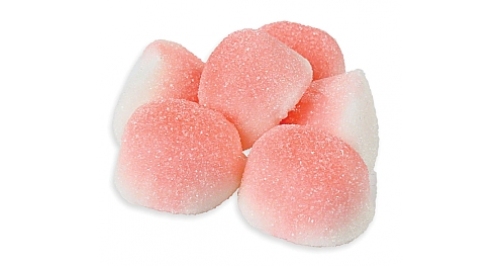
I made the snouts and ears out of gummy strawberry puffs. I cut one gummy in half for the ears, and I left them whole for the snouts. I  cut them with a pair of kitchen scissors, to get a nice clean cut.

I dotted the eyes and nostrils using black Wilton Sparkle Gel. I can’t tell you how useful this stuff is. It comes in many colors, and dries pretty quickly so you don’t have to worry about dripping. It is great for detail work and especially if you have to do a lot of details in a lot of colors. Much easier than mixing different batches of royal icing.

For the tails, I used Twizzlers Pull and Peel. I used half of a single strand for each tail. I molded them into the squiggle right before placing on the cupcake.

And there you have it. These cupcakes inspired my next project, which I’ll be posting about next week. Can you guess what it is?

Posted in Cupcakes, Frostings/Icings | Comments Off on Oink!!

My favorite places to buy supplies

Cake decorating is not a cheap hobby. There are tons of toys and gadgets to make your life easier and your cakes prettier. I figured I would share the stores I have found most useful for cake decorating supplies. All of these stores have websites where you can order directly.

N.Y. Cake (for all things cake related)

N.Y. Cake is located in Manhattan (56 West 22nd Street New York, NY 10010). They also have a store on the West coast (N.Y. Cake West 10665 W. Pico Blvd. Los Angeles, CA 90064). If you are in the area, this store is a really interesting place to visit. They have EVERYTHING. Not only do they have every size and shape pan, cake board, and cake box, but they also have anything else you could want for your cake. They have cookie cutters, candy molds, edible glitter, spray on color, flowers, and ready made fondant in a bunch of colors. Perhaps the coolest thing I have seen there is a huge 2-lb sheet of Rice Krispies Treat used for sculpting cakes. I vow to someday make a cake where I need to sculpt things out of Rice Krispies Treat, just because it is so cool.

Rice_krispie_treat

I rarely walk out of this store without spending at least $100.
Candyland Crafts (for candy making)

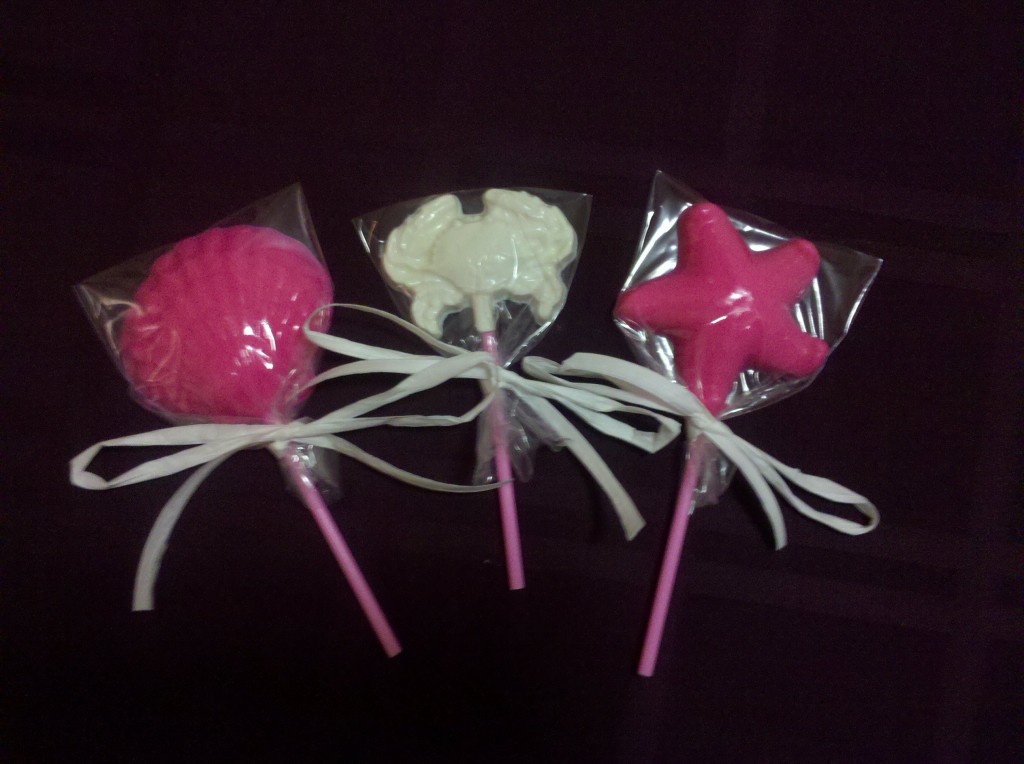
Occasionally it is fun to decorate cakes with custom-made candy. This website has everything you need to make candies and lollipops in nearly any shape or color. They have a lot of unique molds that I haven’t seen in regular stores. They also have colored lollipop sticks, and really cute boxes, bags, and bows for fancy packaging of your candy once it is made. Even though I mainly make cakes, I like making lollipops for parties because you can coordinate them with your theme. Plus, they make a nice favor for guests to take home. Here are some lollipops that I made for a joint birthday party for my mother-in-law and I (my 30th, her 60th):

Lollipops

Kitchen Krafts (for unique baking pans)

I haven’t shopped here yet, but my mom had a catalog and I thought this place was really cool. They have a lot of kooky baking pans for making different shapes, filled cupcakes, and even different flavors within a single cake or cupcake. They also have a lot of neat tools and gadgets for the kitchen. I foresee spending a lot of money here in the near future…

Posted in Baking Supplies | Comments Off on My favorite places to buy supplies

Who’s up for a game of Scrabble?

I have a friend who is amazingly good at Scrabble. It puts me to shame. So when we had a game night to celebrate his 40th birthday, I thought the only appropriate cake for him would be a regulation size Scrabble board.

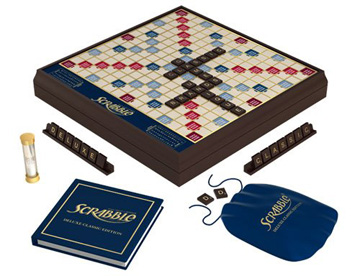
I wanted my cake to look like the special edition set of Scrabble. This set is made of wood, and stands a few inches high. It looks a lot more substantial than the traditional flat cardboard game board. This was my inspiration:

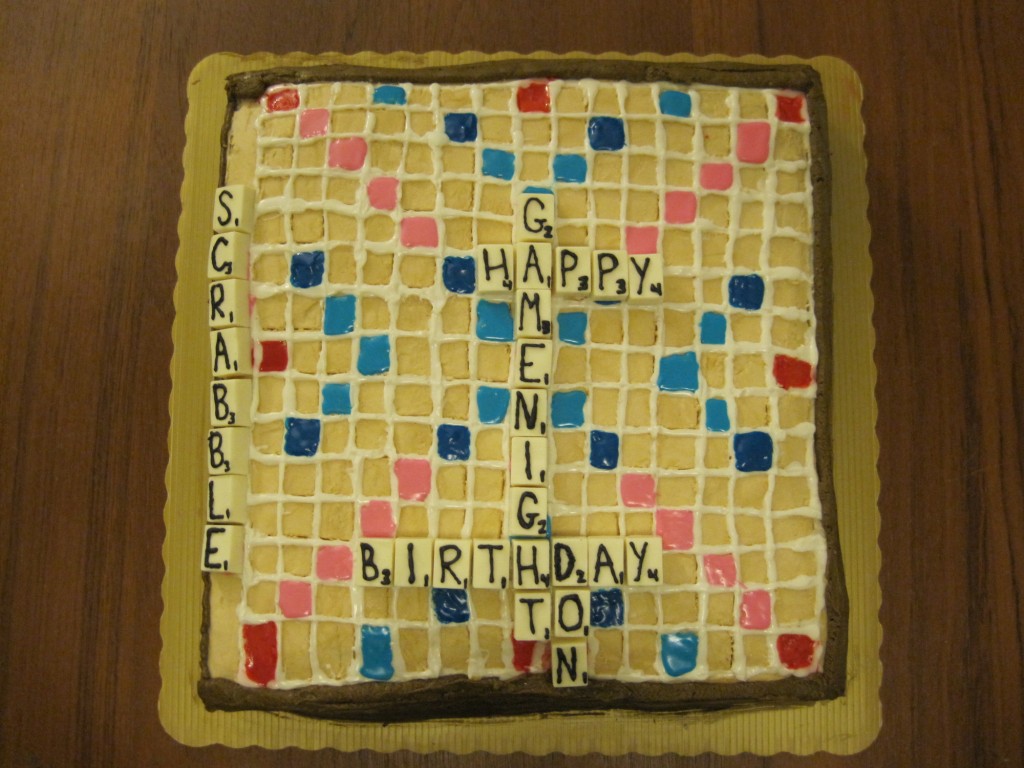
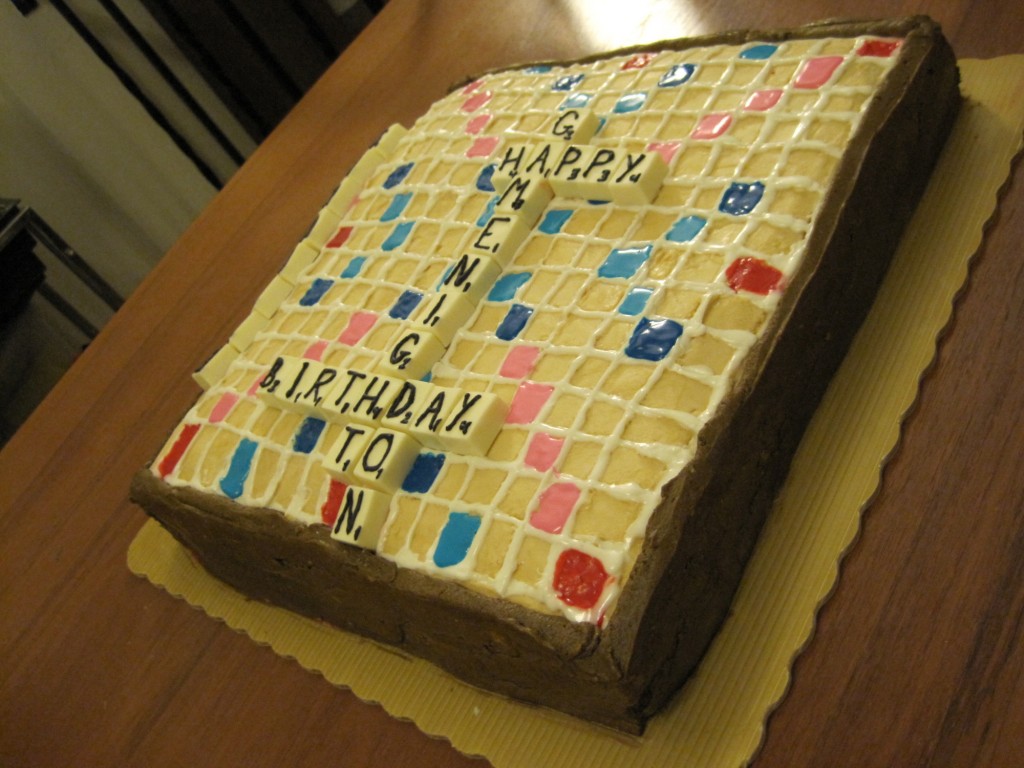
This is how my cake turned out. I was pretty happy with the final product, even though it took a LOT of work to get to this point and I encountered a few hiccups.

Scrabble1

Scrabble2

A traditional scrabble board is a 15×15 grid. I made a 13×13 cake, and made the squares a little less than an inch wide/tall so that I could fit all 225 squares on the board. To make the cake, I made two 9×13 cakes. I cut one cake in half, and placed that half next to the full cake, so that the 9-inch sides lined up. I frosted the whole cake with tan buttercream, and then the outer edges with a darker brown buttercream.

To make the grid and the square colors, I used Wilton cookie icing, which comes in a variety of colors. While I liked the overall shiny look of the dried icing, I found that it dripped a lot before it dried, since the cake was not entirely level. If I were to do it again, I would have made the grid with white royal icing. I would wait 1-2 hours for it to set (in the fridge), and then I would flood the squares with the cookie icing. This way, the grid would act as a wall to keep the icing in place while it dried.

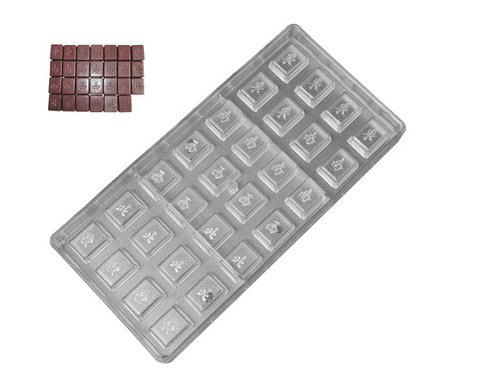
I made the Scrabble pieces a few days before making the cake. They are made from white Merckens candy melts.  This is my favorite brand of candy melt. They taste like vanilla and come in great colors. Luckily, I found a candy mold shaped as Mahjong tiles that were the perfect size for my Scrabble tiles.

Chocolate_molds

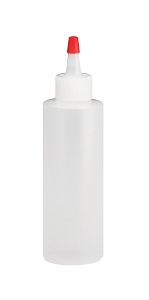
Since I wanted the top of the tiles to be smooth instead of having Chinese characters, I put tiny wax paper squares at the bottom of each mold. I melted the candy pieces in the microwave and poured it into a squeeze bottle designed for candy making.

Then I squeezed the melted candy into each mold and placed in the freezer for about 20 minutes. I removed the candy, carefully took off the wax paper, and they were ready to go! After the tiles reached room temperature, I wrote the letters and correct letter values in black royal icing. I affixed the tiles to the cake using the white cookie icing.

Posted in Cakes | 1 Comment